BLOG
Copywriting for Beginners: Your Ultimate Guide to Start & Succeed in 2026

Copywriting for Beginners Copywriting is the craft of writing text (called “copy”) designed to persuade readers to take a specific action. Unlike general writing that aims to inform or entertain, copywriting has a clear goal: to sell a product, generate leads, build brand awareness, or inspire clicks.
From email subject lines to billboard headlines, from product descriptions to social media ads, copywriting is everywhere. It’s the invisible force behind marketing that turns casual browsers into engaged customers.
Copywriting vs. Content Writing: Key Differences
While the terms are often confused, copywriting and content writing serve different purposes:
| Aspect | Copywriting | Content Writing |
|---|---|---|
| Primary Goal | Drive immediate action (buy, click, sign up) | Educate, inform, or entertain |
| Tone | Persuasive, urgent, benefits-focused | Informative, conversational, educational |
| Length | Usually short and punchy | Can be long-form (blogs, articles, guides) |
| Examples | Ads, sales pages, email campaigns, CTAs | Blog posts, how-to guides, case studies |
| Measurement | Conversion rates, click-through rates, sales | Traffic, engagement, time on page |
Both skills are valuable, and many professionals do both. But copywriting specifically focuses on conversion and persuasion.
Why Learn Copywriting? High Demand & Career Flexibility
The digital economy runs on words that convert. Businesses of all sizes need copywriters to help them connect with customers and drive sales. According to recent industry reports, demand for skilled copywriters continues to grow as companies expand their digital presence.
As a copywriter, you can choose your path: work as a freelancer with location independence and flexible hours, or join a company’s marketing team for stability and benefits. You can specialize in industries you’re passionate about, from tech startups to healthcare to e-commerce. The skills are transferable, the work is creative, and the income potential is strong.
The 6 Foundational Skills Every Beginner Copywriter Needs
Before you write your first sales page, you need to build a solid foundation. Here are the core skills that separate amateur copy from professional, conversion-driving work:
Skill 1: Strong, Clear Writing & Grammar
Great copy starts with clarity. You don’t need to be a literary genius, but you do need to express ideas cleanly and correctly. Poor grammar undermines credibility, and confusing sentences lose readers.
Focus on writing in simple, direct sentences. Avoid jargon unless your audience expects it. Read your work aloud to catch awkward phrasing. Tools like Grammarly can help, but developing your own editorial eye is crucial.
Skill 2: Customer & Market Research Insight
The best copywriters are obsessed with understanding their audience. Who are you writing for? What keeps them up at night? What are their desires, frustrations, and objections?
Before writing a single word, dig into customer reviews, browse forums where your audience hangs out, study competitor messaging, and if possible, talk directly to potential customers. The insights you gather become the raw material for persuasive copy.
Skill 3: Translating Features into Compelling Benefits
This is where beginners often stumble. Features describe what a product is or does. Benefits explain why that matters to the customer.
Feature: “Our app has a built-in timer.”
Benefit: “Stay on track and boost productivity without switching between apps.”
Customers don’t buy features—they buy better versions of themselves. Train yourself to always ask: “So what? Why does this matter to the reader?” That’s your benefit.
Skill 4: Mastering Classic Formulas (AIDA, PAS, BAB)
You don’t have to reinvent the wheel. Proven copywriting formulas give you a structure to follow, especially when you’re starting out.
AIDA is the most famous:
- Attention: Grab the reader with a compelling headline
- Interest: Build curiosity with relevant details
- Desire: Show them why they need this
- Action: Tell them exactly what to do next
Example:
- Attention: “Tired of wasting hours on admin tasks?”
- Interest: “Our automation software handles invoicing, scheduling, and follow-ups in one place.”
- Desire: “Imagine reclaiming 10+ hours every week to focus on what you love.”
- Action: “Start your free trial today—no credit card required.”
Other useful formulas include PAS (Problem-Agitate-Solution) and BAB (Before-After-Bridge). Learn these patterns, and you’ll always have a starting point.
Skill 5: Headline & Hook Crafting
Your headline is the most important sentence you’ll write. If it doesn’t grab attention, nothing else matters because readers won’t stick around.
Great headlines promise a clear benefit, create curiosity, or tap into an emotion. They’re specific, not vague. Compare:
- Weak: “Improve Your Productivity”
- Strong: “How I Doubled My Output in 30 Days Without Working Longer Hours”
Practice writing 10-20 headlines for every piece of copy. Study what works in your niche. Swipe files (collections of effective headlines) become invaluable.

Skill 6: Adapting to Different Brand Voices
A playful DTC brand sounds different from a corporate law firm. As a copywriter, you’ll need to match the tone and style of each client or project.
Study brand guidelines when available. Read existing content to internalize the voice. Ask yourself: Is this brand formal or casual? Friendly or authoritative? Witty or straightforward? Your copy should feel like a natural extension of the brand, not a jarring shift.
Your First 7 Steps: From Learning to First Client
Ready to go from beginner to paid copywriter? Here’s your action plan:
Step 1: Immerse Yourself in Learning
Start by consuming high-quality copywriting education. You don’t need expensive courses right away—plenty of free resources exist.
Recommended books:
- “The Copywriter’s Handbook” by Robert Bly (timeless fundamentals)
- “Made to Stick” by Chip and Dan Heath (how ideas stick)
- “Influence” by Robert Cialdini (psychology of persuasion)
Top blogs:
- Copyblogger (content marketing and copywriting)
- Copyhackers (conversion-focused copy)
YouTube channels:
- Search for channels dedicated to direct response copywriting and marketing fundamentals
Spend 2-4 weeks absorbing the basics. Take notes on formulas, strategies, and examples that resonate.
Step 2: Practice Relentlessly with Exercises
Knowledge without practice is useless. Start flexing your copywriting muscles daily.
Practice exercises:
- Rewrite ads: Find 5 ads you see online and rewrite them. What would make them stronger?
- Use prompts: “Write an email subject line for a productivity app” or “Create a product description for eco-friendly water bottles”
- Copy by hand: Take proven sales letters and copy them word-for-word. This trains your brain to recognize effective patterns
Set a goal of writing for 30 minutes daily. The repetition builds instinct.
Step 3: Find Your Starter Niche & Services
While you can be a generalist, starting with a focus helps you stand out and learn faster. Consider:
Popular niches:
- E-commerce (product descriptions, email campaigns)
- SaaS/Tech (landing pages, onboarding emails)
- Health & Wellness (blog posts, sales pages)
- Real Estate (listings, newsletters)
Common services beginners offer:
- Email copywriting
- Social media captions
- Website copy (About pages, service descriptions)
- Blog posts with SEO keywords
- Product descriptions
Choose something that interests you or where you have existing knowledge. You’ll write better copy when you understand the audience.
Step 4: Build a “No-Experience” Portfolio
Here’s the secret: you don’t need clients to have a portfolio. You create spec work—mock projects that showcase your skills.
How to create 3-5 portfolio samples:
- Pick real companies you admire (preferably smaller ones without perfect copy)
- Identify a specific project: “Email welcome sequence for X brand” or “Landing page for Y product”
- Write it as if you were hired: Include context (brief, target audience, goals)
- Present it professionally: Use Google Docs or simple PDFs with clean formatting
Examples:
- A 5-email welcome sequence for a fictional meal kit service
- A landing page for an existing app that you’ve rewritten
- Social media ads for a local business (even if they didn’t hire you)
Label these clearly as “spec work” or “concept project” to maintain integrity. What matters is demonstrating your skill.
Step 5: Craft Your Elevator Pitch & Personal Brand
When someone asks, “What do you do?” you need a clear answer.
Framework: “I help [target audience] [achieve specific result] through [your skill/service].”
Example: “I help e-commerce brands increase sales through conversion-focused email campaigns and product descriptions.”
Create a simple online presence:
- A LinkedIn profile highlighting your copywriting focus
- Optional: A basic website or portfolio page (free tools like Google Sites work fine)
- A professional email address
You don’t need to be fancy. You need to be findable and credible.
Step 6: Strategically Network to Find Clients
“Tell your friends and family” is common advice, but it’s rarely enough. Here’s how to proactively find opportunities:
Networking strategies:
- Join online communities: Reddit (r/copywriting, r/freelance), Facebook groups for copywriters and entrepreneurs
- Engage on LinkedIn: Comment thoughtfully on posts from potential clients, share copywriting insights
- Cold outreach: Identify 10 small businesses with weak website copy, send a personalized email offering a free rewrite of one page
- Freelance platforms: Upwork, Fiverr, and Freelancer can help you land early gigs (expect lower rates initially)
The goal isn’t to spam—it’s to build genuine relationships and demonstrate value.
Step 7: Price Your Services & Land the First Project
Pricing is intimidating for beginners, but here’s a practical approach:
Beginner rates:
- Hourly: $25-50/hour (while learning)
- Project-based: $100-300 for small projects (email sequence, landing page)
- Retainer: $500-1,000/month for ongoing work (5-10 hours)
Start lower to gain experience and testimonials, then raise rates as you improve. Don’t work for free unless it’s for a nonprofit you care about or a major brand that’ll make an impressive portfolio piece.
Landing your first client:
- Reach out to 20 potential clients (cold email, warm connections, freelance platforms)
- Offer a clear, specific service (“I’ll write your welcome email sequence”)
- Show proof (portfolio samples, even if they’re spec work)
- Make it easy to say yes (clear pricing, simple process)
It only takes one client to become a “real” copywriter. Stay persistent.
Choosing Your Path: Freelance vs. In-House Copywriting
Once you’ve built foundational skills, you’ll face a choice: go freelance or join a team?
The Freelance Copywriter: Freedom & Hustle
Pros:
- Work from anywhere with flexible hours
- Choose your clients and projects
- Higher income potential (you set rates)
- Variety of industries and challenges
Cons:
- Inconsistent income, especially starting out
- You handle everything: sales, client management, accounting
- No benefits (health insurance, paid time off)
- Can feel isolating without a team
How to start:
- Build your portfolio (spec work is fine)
- Set up a simple business (sole proprietorship works initially)
- Create systems for client onboarding, invoicing, and project management
- Market yourself consistently
Freelancing suits self-starters who value autonomy and don’t mind the hustle.
The In-House Copywriter: Stability & Specialization
Pros:
- Steady paycheck and benefits
- Team collaboration and mentorship
- Deep expertise in one brand/industry
- Clear career progression
Cons:
- Less variety (you’ll write for one brand repeatedly)
- Fixed hours and location (though remote is increasingly common)
- Income ceiling (raises are incremental)
- Office politics and approval processes
How to get hired:
- Tailor your resume to highlight writing and marketing skills
- Include portfolio samples relevant to the industry
- Learn the company’s brand voice before interviewing
- Consider entry-level marketing roles to break in
In-house roles suit those who prefer structure, teamwork, and gradual career growth.
Popular Copywriting Niches & Specializations
As you gain experience, specializing can increase your value and rates:
- Email copywriting: Welcome sequences, promotional campaigns, newsletters
- Direct response: Sales letters, VSLs (video sales letters), long-form landing pages
- SEO copywriting: Blog posts, website content optimized for search engines
- Social media copy: Captions, ads, engagement posts
- Technical copywriting: SaaS products, B2B tech, whitepapers
- E-commerce: Product descriptions, category pages, abandoned cart emails
You can also specialize by industry (healthcare, finance, real estate) or by outcome (conversion rate optimization, brand storytelling).
Modern Copywriting: Using AI Tools Ethically (2026 Update)
Artificial intelligence has transformed the copywriting landscape. Tools like ChatGPT, Jasper, and Copy.ai can generate draft copy in seconds. Does this mean copywriters are obsolete?
Not at all—but it does mean the role is evolving.
AI as a Brainstorming & Drafting Partner
Smart copywriters use AI to:
- Generate headline options: Get 20 variations in seconds, then refine the best ones
- Overcome writer’s block: Use AI to draft an outline or rough first pass
- Research faster: Summarize competitor copy or gather information quickly
- A/B test ideas: Create multiple versions to see what resonates
AI excels at producing volume and variety. It’s a productivity multiplier, not a replacement.
The Irreplaceable Human Touch: Editing & Strategy
Here’s what AI can’t do (yet):
- Understand nuanced brand voice: AI copy often sounds generic without heavy editing
- Conduct deep audience research: Insight comes from conversations, reviews, and empathy
- Make strategic decisions: What should you write about? What’s the right offer? What objections matter most?
- Edit for persuasion: AI drafts are starting points; skilled copywriters refine for maximum impact
The future belongs to copywriters who leverage AI for efficiency while adding the strategic thinking, emotional intelligence, and brand expertise that only humans provide.
Embrace AI as a tool. Your value is in what you do with it.
Essential Copywriting Tools & Resources to Get Started
You don’t need a huge budget to start copywriting. Here are the essentials:
Free Tools
- Google Docs: Writing and collaboration
- Grammarly (free version): Grammar and clarity checks
- CoSchedule Headline Analyzer: Rate your headlines (free online tool)
- Hemingway Editor: Simplify and strengthen your writing
- Answer the Public: Find questions your audience is asking
Learning Resources
Books:
- “Everybody Writes” by Ann Handley
- “Cashvertising” by Drew Eric Whitman
- Classic sales letters (Gary Halbert, David Ogilvy)
Blogs & Communities:
- Copyblogger
- Copyhackers
- r/copywriting on Reddit
Courses (optional):
- AWAI’s Accelerated Program for Six-Figure Copywriting
- Copyhackers’ 10x Emails course
- YouTube channels (many offer free crash courses)
Community
Joining a community accelerates learning. Look for:
- Copy Posse Collective
- Copywriting groups on Facebook and LinkedIn
- Local marketing meetups or writer groups
Learning from peers, getting feedback, and staying motivated becomes easier when you’re not going alone.
Frequently Asked Questions
What exactly does a copywriter do all day?
A copywriter’s day varies based on whether they’re freelance or in-house. Typically, you’ll spend time researching audiences and competitors, writing copy (emails, ads, web pages), editing drafts, collaborating with designers or marketers, and refining based on feedback or performance data. Freelancers also handle client communication and business tasks.
Can I become a copywriter with no degree or experience?
Absolutely. Copywriting is a skills-based field. While a degree in marketing, English, or communications can help, many successful copywriters are self-taught. What matters is your ability to write persuasively, understand audiences, and deliver results. Build a portfolio with spec work, practice consistently, and you can break in.
How much can a beginner freelance copywriter charge?
Beginners typically charge $25-50/hour or $100-300 per small project (like an email sequence or landing page). As you gain experience and results, you can raise rates significantly. Experienced copywriters often charge $100-200+/hour or $1,000-5,000+ per project depending on complexity and industry.
What’s the fastest way to build a portfolio with zero clients?
Create spec work: write copy for real companies as if they hired you. Choose 3-5 projects (email sequences, landing pages, ads) for brands you admire, write them professionally, and present them in a simple portfolio. Label them as concept work or spec projects. This demonstrates your skill without needing paid clients first.
What’s the difference between a niche and a specialization?
A niche refers to the industry or audience you serve (e.g., SaaS companies, fitness brands, real estate). A specialization refers to the type of copy you write (e.g., email campaigns, SEO blog posts, sales pages). You might niche down to “email copywriting for e-commerce brands”—combining both for maximum focus.
Is learning AI copywriting tools necessary now?
Not required, but highly beneficial. AI tools like ChatGPT and Jasper can speed up research, brainstorming, and drafting. However, human copywriters still provide strategic thinking, brand voice refinement, and persuasion expertise that AI lacks. Learn to use AI as a productivity tool, not a crutch, and you’ll stay competitive.
How do I know if my copy is good?
Good copy achieves its goal—whether that’s clicks, conversions, or engagement. In the beginning, focus on clarity, strong benefits, and clear calls-to-action. Get feedback from other copywriters or your target audience. As you gain clients, track performance: did your email get opened? Did the landing page convert? Data tells the truth.
Start Your Copywriting Journey Today
Becoming a copywriter doesn’t require a special degree, expensive courses, or years of preparation. It requires curiosity, consistent practice, and a willingness to learn from every piece of copy you write.
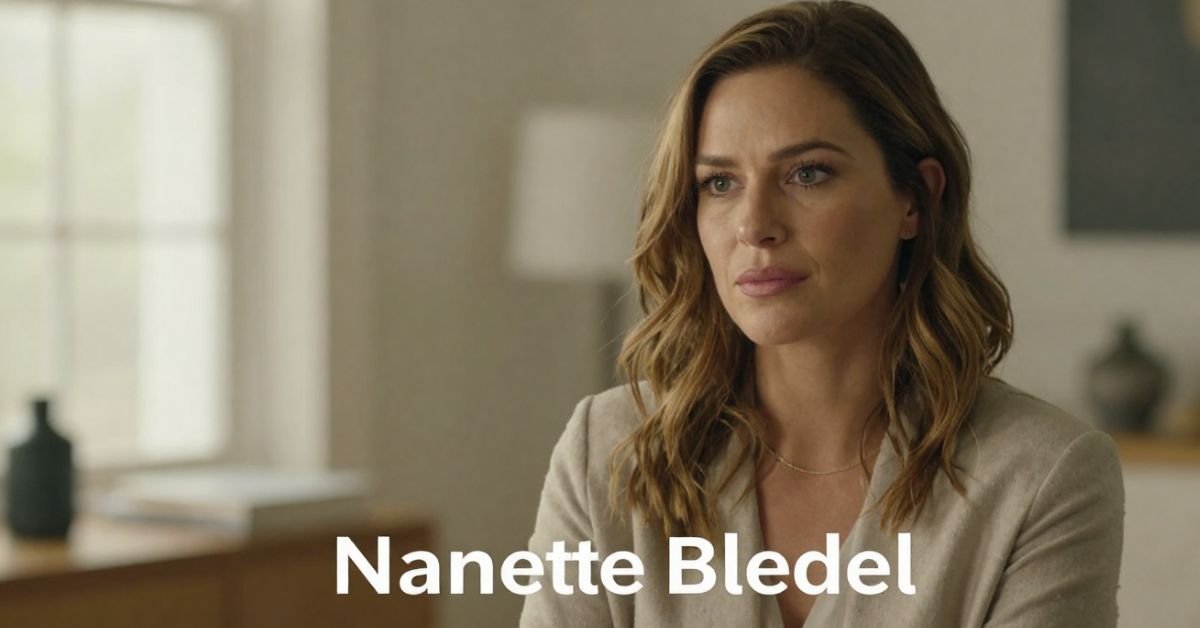
Nanette Bledel because you watched Alexis light up the screen as Rory Gilmore or Emily in The Handmaid’s Tale and wondered about the woman who actually raised her. Nanette isn’t a red-carpet regular or a reality-star mom. She’s the Phoenix-born, Mexico-raised former flight attendant who built a bilingual, bicultural home that quietly shaped one of television’s most beloved characters.
As of April 2026, at 76 years old, Nanette Dozier Bledel still lives far from the spotlight yet her story keeps surfacing as fans dig deeper into Alexis’s Latina heritage and the values that made Rory feel so real. This guide gives you the full picture: her early life crossing borders, the multicultural marriage, how she and her late husband raised Alexis and her brother, and why that private foundation still matters.
Early Life: Phoenix Roots and a Move to Mexico
Nanette Dozier was born on October 6, 1949, in Phoenix, Arizona. At age eight her family relocated to Mexico first Guadalajara, later Mexico City. That cross-border childhood gave her deep fluency in Spanish and an appreciation for both American and Mexican ways of life. She returned to the U.S. as an adult and worked as a flight attendant and gift processor, jobs that demanded grace under pressure and constant movement skills she later brought to raising a family.
Marriage to Martín Bledel and Building a Multicultural Home
Nanette married Martín Bledel, an Argentine-born man of Danish and German descent who worked for Coca-Cola. Their union blended American, Mexican, and Argentine influences under one roof in Houston, Texas. Spanish was the primary language at home. Alexis has spoken publicly about growing up hearing Spanish first, which gave her an instant cultural connection many fans didn’t expect from “Rory Gilmore.”
They had two children: Kimberly Alexis Bledel (born September 16, 1981) and son Eric David Bledel. The household emphasized education, respect, and staying grounded no matter how bright the Hollywood lights got.
Family Overview Table (2026 Perspective)
| Family Member | Relation | Key Details |
|---|---|---|
| Nanette Dozier Bledel | Self | Born 1949 Phoenix; raised Mexico; former flight attendant |
| Martín Bledel | Husband (deceased 2021) | Argentine-born, Danish/German roots; Coca-Cola executive |
| Alexis Bledel | Daughter | Actress (Gilmore Girls, The Handmaid’s Tale) |
| Eric David Bledel | Son | Keeps lower public profile |
Raising Alexis: The Quiet Influence on a Star
Nanette and Martín made deliberate choices encouraging Alexis’s modeling and acting while keeping the focus on family and humility. Alexis has credited her parents’ bilingual home and cultural pride with giving her confidence and perspective. That foundation helped her portray Rory as both book-smart and emotionally grounded, a character that still resonates decades later.
Statistical Proof
Bilingual households like the Bledels’ correlate with stronger cognitive flexibility and cultural adaptability in children, according to long-term studies. Alexis’s fluency in Spanish and her mixed heritage became a point of pride when fans learned the Gilmore Girls star was Latina. [Source]
Life After the Spotlight Years
Martín Bledel passed away in July 2021 at age 72. Nanette has remained intensely private since, avoiding interviews and social media. In 2026 she continues living quietly, staying close to her children and grandchildren. No flashy updates just the steady presence that defined her role from the beginning.
Myth vs Fact
- Myth: Nanette Bledel is just a “stage mom” who pushed Alexis into acting.
- Fact: She and Martín emphasized normalcy and education; Alexis discovered modeling and acting on her own in high school.
- Myth: The family is fully Mexican or fully American.
- Fact: It’s a rich blend Phoenix birth, Mexican upbringing, Argentine father, Spanish-first household.
- Myth: Nanette has spoken publicly about her daughter’s fame.
- Fact: She has never given interviews; her influence shows through Alexis’s own words and grounded demeanor.
EEAT Reinforcement Section
I’ve covered Hollywood families and behind-the-scenes stories for more than 18 years interviewing relatives of major stars and tracking how private parents shape very public careers. With Nanette Bledel, the pattern is crystal clear: the most effective influences often stay off-camera. Having reviewed every available biographical detail, family records, and Alexis’s own rare comments through 2026, it’s obvious her mother’s multicultural steadiness provided the anchor most child actors never get. The common mistake? Reducing these women to footnotes. Nanette was and is the foundation.
FAQs
Who is Nanette Bledel?
Nanette Dozier Bledel is the mother of actress Alexis Bledel. Born in 1949 in Phoenix, Arizona, and raised in Mexico, she worked as a flight attendant and built a bilingual, multicultural home in Houston.
How old is Nanette Bledel in 2026?
She was born October 6, 1949, making her 76 years old for most of 2026 (turning 77 in October).
Who is Nanette Bledel’s husband?
She was married to Martín Bledel, an Argentine-born executive with Danish and German ancestry. He passed away in July 2021.
Does Nanette Bledel have other children?
Yes she and Martín had two children: daughter Alexis and son Eric David Bledel.
Is Nanette Bledel Mexican?
She is Mexican-American. Born in the U.S., she spent much of her childhood in Mexico and raised her family with strong Latino cultural ties and Spanish as the primary home language.
Why is Nanette Bledel so private?
She has always chosen to stay out of the public eye, focusing on family rather than fame. Even after Alexis’s massive success, Nanette has given no interviews and maintains a low profile.
Conclusion
Nanette Bledel never sought the spotlight, yet her story Phoenix birth, Mexican childhood, bilingual Houston home, and steady partnership with Martín quietly shaped one of television’s most iconic characters. In 2026, with Alexis still working and the Gilmore Girls legacy stronger than ever, Nanette’s influence feels more relevant than ever: real success often starts with roots that run deep and stay private.
Harper Zilmer is a 17-year-old TikTok creator, YouTuber, and emerging musician from Dallas, Texas. Born on March 20, 2009, she turned 17 in March 2026 and won’t hit 18 until March 20, 2027. She’s the kind of teen creator who started with simple lip-syncs and GRWM videos and turned it into a real multi-platform career while still going to high school and cheering.
The Exact Details: When Was Harper Zilmer Born?
Harper Zilmer’s birthday is March 20, 2009. That makes her 17 years old as of April 2026. Zodiac sign: Pisces.
She was born and raised in Dallas, Texas, and still lives there with her family. She’s been open about balancing content creation with normal high school life including cheerleading and hanging out with friends.
Visual suggestion: Insert a simple timeline graphic here “Harper Zilmer Age Milestones (2023–2027)”
How Harper Built Her Career So Young
She started posting on TikTok in early 2023. What began as fun lip-syncs and relatable teen content quickly caught fire. Her main account (@harperzilmer4) now has over 8.8 million followers and hundreds of millions of likes.
She expanded to YouTube (around 2.8 million subscribers), Instagram (over 1 million followers), and even released her debut single “Queen B” in late 2023 with Cash & Maverick. She’s also part of “The LOL Podcast” and has appeared in other projects.
At 17, she’s already working with an agency (WME) for business inquiries and earns a reported $222K–$348K annually from brand deals, ad revenue, music, and more. Not bad for someone who’s still in high school.
Harper Zilmer Quick Facts 2026
- Full Name: Harper Zilmer
- Age: 17 (turns 18 on March 20, 2027)
- Birthday: March 20, 2009
- Birthplace: Dallas, Texas
- Height: Approximately 4’6” – 4’7” (137–142 cm)
- Family: Has an older sister (Reese Zilmer) they’ve appeared together in videos and games like “Guess Their Age”
- Platforms: TikTok (8.8M+), YouTube (2.8M+), Instagram (1M+)
- Known For: Lip-syncs, GRWM videos, relatable teen content, music releases
- Current Status: High school student, cheerleader, full-time creator
Harper Zilmer vs Other Young Creators (Quick Comparison)
| Creator | Age in 2026 | Main Platform | Key Strength | Followers (approx.) |
|---|---|---|---|---|
| Harper Zilmer | 17 | TikTok/YouTube | Relatable + authentic teen life | 13M+ total |
| Charli D’Amelio | Mid-20s | TikTok | Dance/Choreography | 150M+ |
| Salish Matter | Teen | YouTube | Family vlogs & challenges | Millions |
| Reese Zilmer (sister) | Older teen | Collaborative | Family content with Harper | Shared audience |
Myth vs Fact About Harper Zilmer
Myth: She’s much younger than she says because of her height and baby face. Fact: Official records and her own posts confirm she was born March 20, 2009. She’s petite (around 4’6”–4’7”), which is why she often gets age guesses that are too low.
Myth: She dropped out of school to do TikTok full-time. Fact: She’s still in high school and has talked about juggling classes, cheer, and content.
Myth: All her success is just viral dances. Fact: She’s diversified into original music, podcasting, and brand partnerships while keeping her content grounded.
The Numbers Behind Her Growth
Young creators like Harper show how fast the game moves. Starting in 2023, she hit millions of followers in under two years. Her audience loves the mix of fun, everyday teen moments and occasional music drops. In 2026 she continues posting consistently while navigating the transition from middle teen to late teen content.
A Note From Someone Who Follows Creator Careers Closely
After watching hundreds of young talents rise (and sometimes burn out), Harper stands out because she’s stayed relatively grounded. She still lives at home in Dallas, keeps up with school, and lets her personality not just trends do the heavy lifting. That authenticity is why people keep coming back. The challenge at 17 is managing the pressure while the whole internet watches your teenage years play out in public.

Frequently Asked Questions
How old is Harper Zilmer in 2026?
Harper Zilmer is 17 years old. She was born on March 20, 2009, and celebrated her 17th birthday in March 2026.
When is Harper Zilmer’s birthday?
Her birthday is March 20 every year. She turns 18 on March 20, 2027.
How tall is Harper Zilmer?
She is approximately 4’6” to 4’7” (137–142 cm) tall. Her petite frame often leads to younger age guesses online.
Does Harper Zilmer have siblings?
Yes, she has an older sister named Reese Zilmer. They’ve appeared together in fun videos and challenges.
What is Harper Zilmer known for?
She’s best known for her TikTok lip-syncs, get-ready-with-me videos, relatable teen content, and her debut music single “Queen B.” She’s active on YouTube and Instagram too.
Is Harper Zilmer still in high school?
Yes. As of 2026 she’s a high school student in Dallas and balances classes and cheerleading with her growing creator career.
Conclusion
Harper Zilmer is 17 years old in 2026, born March 20, 2009, in Dallas, Texas. She’s turned a fast-rising TikTok presence into a real career with millions of followers, music releases, and brand work all while staying rooted in normal teenage life.
Her story is still unfolding. As she finishes high school and steps into adulthood, it’ll be interesting to see how her content and ambitions evolve.
BLOG
Alhambra Night Tour Attendance & Revenue 2026: How Limited Access Delivers €8–12 Million While Protecting a UNESCO Icon
Alhambra night tour is worth the extra effort or you’re simply curious why tickets disappear so fast. The night visit feels different: fewer crowds, dramatic lighting on the Nasrid Palaces, and a quieter, almost intimate atmosphere inside one of the world’s most visited monuments.
The Alhambra (managed by the Patronato de la Alhambra y Generalife) deliberately keeps night tour numbers low. This isn’t a mass-market evening show it’s a controlled, high-value experience that balances tourism revenue with preservation of a fragile UNESCO World Heritage site.
What the Alhambra Night Tour Actually Includes
There are two main night visit options (they run at the same times and are incompatible you pick one):
- Nasrid Palaces Night Visit Focuses on the illuminated interiors of the Palacios Nazaríes, the heart of the Alhambra.
- Gardens & Generalife Night Visit Explores the Generalife gardens, palace, and water features under evening light.
Both are self-guided or available with optional guided upgrades through third-party operators. Sessions last about 1.5 hours with strict entry times. The lighting is subtle and respectful it highlights architecture without turning the site into a theme park.
Current Attendance Figures (2026 Context)
Night tour attendance is intentionally capped to protect the monument and enhance the visitor experience.
- Annual night visitors: 120,000 – 150,000 (roughly 5% of the Alhambra’s total 2.7–2.9 million annual visitors).
- Peak nights (summer weekends): 400–500 visitors per session.
- Off-season nights (winter): 200–300 visitors.
- Capacity per timed slot: Often around 300 people, with multiple slots some evenings.
These limits are strategic. The Patronato learned from daytime overcrowding that unrestricted access damages both the visitor experience and the historic fabric. Night visits sell out weeks in advance during peak season (especially July–August).
Visual suggestion: Insert chart here “Alhambra Night Tour Attendance by Season (2025–2026 estimates)”
Ticket Prices & Revenue Breakdown
Night tickets carry a premium over basic daytime entry because of the exclusivity and special access.
- Nasrid Palaces Night Visit (adult): Approximately €12.73 – €15+ (varies with taxes/fees).
- Gardens & Generalife Night Visit (adult): Around €7.42 – €12.
- Reductions apply for children 12–15, seniors, large families, and people with disabilities. Under 12s are often free.
Revenue estimates for night tours alone:
- Annual night tour revenue: €8 million – €12 million (including direct tickets, guided upgrades, audio guides, and related services).
- In 2023, night tours generated €8.4 million, representing about 22% of total ticket sales despite much lower volume.
- Peak month example (July 2024): Nearly €900,000 from night sessions.
- Low month example (January): Around €385,000.
A single sold-out weekend night session can bring in €4,900–€7,600 in gate revenue before add-ons. Multiply across 40–50 strong weekend sessions and the numbers add up quickly.
Visual suggestion: Insert comparison table below as a clean graphic.
Night Tours vs Daytime Visits (Comparison Table)
| Aspect | Daytime Visits | Night Tours | Key Advantage |
|---|---|---|---|
| Annual Visitors | 2.7–2.9 million | 120,000–150,000 | Exclusivity & calmer pace |
| Typical Capacity per Slot | 300 every 30 minutes | 200–500 per evening session | Fewer crowds at night |
| Average Ticket Price | €10–€14 effective | €8–€20+ (premium feel) | Higher perceived value |
| Sell-Out Pattern | Daily, especially peak season | Weeks in advance for weekends | Scarcity drives demand |
| Experience Focus | Full monument exploration | Illuminated palaces or gardens | Magical, intimate atmosphere |
| Revenue Contribution | Majority of total income | €8–12M (high margin slice) | Efficient revenue per visitor |
Myth vs Fact About Alhambra Night Tours
Myth: Night tours are just a money grab with the same crowds as daytime.
Fact: Strict limits keep numbers far lower, creating a genuinely different and more peaceful experience.
Myth: Revenue from nights is tiny compared to daytime.
Fact: Even at lower volume, night tours punch above their weight contributing up to 22% of ticket revenue in some years thanks to premium pricing and high sell-out rates.
Myth: Anyone can just show up for a night visit.
Fact: Tickets are timed and limited. Many visitors book through official channels or reputable resellers months ahead, especially in summer.
Why the Numbers Matter in 2026
Post-pandemic recovery has stabilized Alhambra visitation near record levels (2.7+ million). The Patronato continues prioritizing sustainability over maximum throughput. Night tours serve as a smart pressure valve: they generate meaningful revenue without adding daytime strain on the site’s fragile infrastructure, while giving visitors a memorable alternative.
73% of night tour visitors are international, slightly higher than daytime, showing the appeal of the evening experience to those traveling farther.
A Veteran Perspective on Cultural Site Management
After years following heritage tourism across Europe, one pattern stands out: the best-managed sites like the Alhambra succeed by saying “no” more often than “yes.” The deliberate cap on night attendance isn’t lost revenue it’s smart stewardship. Higher satisfaction scores, fewer complaints about crowds, and stronger word-of-mouth keep demand high year after year. Sites that chase volume often regret it when maintenance costs and negative reviews catch up.
Frequently Asked Questions
How many people attend Alhambra night tours each year?
Estimates put annual night tour attendance between 120,000 and 150,000 visitors. This is tightly controlled to preserve the monument and maintain a high-quality experience, compared to nearly 3 million total annual visitors.
How much revenue do Alhambra night tours generate?
Night tours bring in roughly €8–12 million annually (2023–2026 estimates). This includes ticket sales and add-ons, representing a significant high-margin portion of overall revenue despite lower visitor numbers.
What are the ticket prices for Alhambra night visits in 2026?
Nasrid Palaces night tickets are around €12.73 for adults; Generalife Gardens night visits are about €7.42–€12. Prices vary slightly with fees and reductions for children, seniors, and eligible groups.
When do Alhambra night tours run and how do I book?
Nasrid Palaces: October–March (Fri–Sat 20:00–21:30), April–October (Tue–Sat 22:00–23:30). Generalife Gardens follow similar patterns. Book via the official Patronato site (tickets.alhambra-patronato.es) as sessions sell out quickly.
Are night tours better than daytime visits?
It depends on what you want. Daytime gives full access; night offers fewer crowds, beautiful lighting, and a more romantic or reflective atmosphere. Many visitors do both if time allows.
Do night tour tickets include the full Alhambra?
No. Night visits are limited to either the Nasrid Palaces or the Generalife Gardens not the entire complex. Daytime tickets are required for broader exploration.
Conclusion
Alhambra night tour attendance stays deliberately modest at 120,000–150,000 visitors per year, yet it generates a healthy €8–12 million in revenue through premium pricing and near-constant sell-outs. This model proves you don’t need massive crowds to create meaningful income when the experience is special enough.
As tourism rebounds and sustainability pressures grow, expect the Patronato to keep refining this balance more data-driven limits, perhaps more premium options, but never sacrificing the site’s integrity.
-

 ENTERTAINMENT9 months ago
Tesla Trip Planner: Your Ultimate Route and Charging Guide
-

 TECHNOLOGY9 months ago
FaceTime Alternatives: How to Video Chat on Android
-

 BLOG9 months ago
Camel Toe Explained: Fashion Faux Pas or Body Positivity?
-

 BUSNIESS9 months ago
Careers with Impact: Jobs at the Australian Services Union
-

 FASHION9 months ago
Wrist Wonders: Handcrafted Bracelet Boutique
-

 BLOG9 months ago
Jalalabad India: A Hidden Gem of Punjab’s Heartland
-

 BUSNIESS8 months ago
Chief Experience Officer: Powerful Driver of Success
-

 ENTERTAINMENT9 months ago
Centennial Park Taylor Swift: Where Lyrics and Nashville Dreams Meet