
BLOG
Maraschino Cherries: The Complete Guide to Cocktail Cherries

Maraschino cherries are preserved cherries that have been sweetened and artificially colored to create the bright red, firm garnishes familiar in cocktails and desserts. Unlike fresh cherries, these processed fruits undergo extensive transformation that removes their natural flavor, color, and most nutritional value, replacing them with sugar syrup, artificial coloring, and often almond extract flavoring.
The cherries used for maraschino production are typically light-colored sweet varieties including Royal Ann, Rainier, and Gold cherries. These pale varieties serve as blank canvases for the brining and coloring process. The final product bears little resemblance to the fruit that entered the factory, with its natural tartness replaced by intense sweetness and its delicate texture transformed into a firm, almost rubbery consistency achieved through calcium chloride treatment.
Modern maraschino cherries are produced through a multi-week process involving brine solutions, sulfur dioxide bleaching, artificial food dye (typically FD&C Red 40 or Allura Red AC), and heavy sugar syrup preservation. The stems are removed, pits extracted, and each cherry receives a uniform coating that allows it to maintain its appearance and texture for months, even when submerged in liquid.
History & Evolution: From Croatian Liqueur to American Staple
European Origins in Dalmatia
The maraschino cherry story begins in the coastal region of Dalmatia, now part of Croatia, where marasca cherries grew wild. These small, dark, sour cherries were preserved in a liqueur called maraschino, created by crushing the fruit along with its pits and stems, then distilling the mixture. The resulting clear, cherry-flavored spirit was prized across Europe by the 18th century, and cherries preserved in this liqueur became luxury confections.
This traditional European product was alcohol-preserved, maintaining the fruit’s natural dark color and complex flavor. Italian producers like Luxardo perfected this technique, creating what many consider the authentic maraschino cherry, a world apart from the modern American version.
American Adaptation & Prohibition Impact
The transformation from European delicacy to American staple occurred largely through the work of Ernest H. Wiegand, an Oregon State University horticulture professor. In the early 1900s, American growers in Oregon and Michigan cultivated abundant crops of Royal Ann cherries but lacked preservation methods for export. Wiegand developed a brining process that removed the need for alcohol, making the product more economical and, crucially, legal during Prohibition.

The FDA established initial regulations for maraschino cherries in 1912, but the modern standards defining them as a distinct food product emerged in 1940. These regulations specified the brining process, permitted additives, and established what could legally be called a maraschino cherry, cementing the bright red, heavily sweetened version as the American standard.
Modern Standards & Production
Today’s maraschino cherry industry operates under FDA identity standards that permit specific processing methods and additives. The most common artificial coloring, FD&C Red 40, replaced earlier dyes that raised health concerns. Contemporary production emphasizes shelf stability, uniform appearance, and cost efficiency, producing millions of cherries annually for the food service industry.
However, a craft movement has emerged challenging industrial production. Artisan producers now offer alternatives using natural ingredients, traditional alcohol preservation, and heritage cherry varieties, appealing to bartenders and consumers seeking more authentic flavors.
How Maraschino Cherries Are Made: The Production Process
Brining & Bleaching Stage
Fresh cherries arrive at processing facilities where they’re immediately submerged in a brine solution containing sulfur dioxide and calcium chloride. This four to six week brining period serves multiple purposes: it preserves the fruit, firms the texture through calcium absorption, and bleaches away the natural red or yellow pigments. The sulfur dioxide breaks down anthocyanins (natural color compounds) while the calcium chloride prevents the cherries from becoming mushy during subsequent processing.
After brining, the cherries emerge pale white or cream-colored, stripped of their original flavor and aroma. This blank slate allows manufacturers to apply consistent coloring and flavoring regardless of the cherry variety used.
Coloring & Sweetening
The bleached cherries are then immersed in a heavy sugar syrup containing artificial food coloring, typically FD&C Red 40 (Allura Red AC). Some producers add almond extract to provide the characteristic flavor many associate with maraschino cherries, though this taste bears no resemblance to actual cherry flavor. The cherries soak in this solution, absorbing the sweetness and color uniformly.
The concentration of sugar in the syrup is critical, as it provides preservation through osmotic pressure while creating the glossy appearance and sticky-sweet coating. Some premium producers use alternative colorings or skip artificial dyes entirely, resulting in pale gold or naturally tinted cherries.
Final Processing & Packaging
Before packaging, the cherries are pitted if they weren’t already, and stems are removed to create the uniform, stemless product. Each cherry receives a final coating of syrup and preservatives before being packed into jars with additional liquid to prevent drying. The high sugar content and preservatives allow unopened jars to remain shelf-stable for years, while opened containers can last months when refrigerated.
Culinary Uses: Beyond the Cocktail Garnish
Classic & Modern Cocktails
Maraschino cherries gained prominence as cocktail garnishes during the golden age of American bartending. The Old Fashioned, Manhattan, and Whiskey Sour all traditionally feature a maraschino cherry, adding visual appeal and a touch of sweetness. The Shirley Temple, perhaps the most famous non-alcoholic drink, centers on these cherries as both garnish and flavoring agent.
Modern craft bartenders have split into two camps: some reject artificial maraschino cherries entirely in favor of Luxardo or amarena cherries, while others embrace the nostalgic kitsch of the bright red version. The Aviation cocktail showcases this tension, with purists insisting on Luxardo cherries while others accept the neon alternative.
Desserts & Sweet Treats
The classic ice cream sundae remains incomplete without its crowning maraschino cherry, an American tradition dating back over a century. These cherries also appear in milkshakes, parfaits, and as decorations on cakes and cupcakes. Bakers incorporate them into fruitcakes, pineapple upside-down cakes, and various bar cookies where their bright color and firm texture withstand baking temperatures.
The cherries’ ability to maintain their shape and color when exposed to heat, liquid, and freezing makes them uniquely versatile for commercial food production. This durability, achieved through calcium chloride treatment, explains their ubiquity in processed desserts.
Savory Applications & Creative Uses
Beyond sweets, maraschino cherries traditionally garnish baked ham, where their sweetness complements the meat’s saltiness. They’re essential ingredients in commercial fruit cocktail and appear in various retro salads and appetizers. Some creative cooks use the syrup to flavor homemade cherry cola or incorporate it into glazes and sauces, though the artificial flavoring limits culinary applications.

Nutrition Facts & Health Considerations
Nutritional Profile Comparison
A typical maraschino cherry contains approximately 8 calories, almost entirely from sugar, with negligible protein, fat, fiber, vitamins, or minerals. Compare this to a fresh sweet cherry, which provides vitamin C, potassium, antioxidants, and beneficial plant compounds. The brining and bleaching process destroys most nutrients present in the original fruit, leaving essentially sweetened, colored water trapped in cherry-shaped packages.
A single maraschino cherry contains about 2 grams of sugar, meaning a standard serving of 3-4 cherries delivers 6-8 grams of added sugar with virtually no nutritional benefit. The thick syrup adds additional sugar beyond the cherries themselves.
Artificial Colors & Safety
The primary coloring agent, FD&C Red 40 (Allura Red AC), is FDA-approved but remains controversial. Some studies have linked synthetic food dyes to hyperactivity in sensitive children, though research remains inconclusive. Earlier maraschino cherry dyes contained benzidine, a known carcinogen, but these were banned decades ago.
Current artificial cherries meet federal safety standards for food coloring and preservatives. However, individuals with sensitivities to artificial additives may experience reactions. The high sugar and preservative content makes them unsuitable for people managing diabetes or following whole-food diets.
Healthier Alternatives & Moderation
For those seeking less processed options, several alternatives exist. Luxardo and Fabbri produce cherries preserved in syrup with natural coloring, though these remain high in sugar. Frozen or dried tart cherries provide the antioxidants and nutrients absent from maraschino varieties. Some brands now offer organic maraschino cherries with natural colorings derived from fruit and vegetable extracts.
As with most processed confections, moderation is key. An occasional maraschino cherry as a cocktail garnish or sundae topping poses no health risk for most people, but they shouldn’t be considered a fruit serving or consumed in large quantities.
Top Maraschino Cherry Brands: Buying Guide
Premium & Traditional Brands
Luxardo Maraschino Cherries stand as the gold standard, produced using the original Italian method with marasca cherries preserved in marasca cherry syrup. These dark, complex cherries contain no artificial coloring or flavoring and include stems. They command premium prices ($20-25 per jar) but deliver authentic flavor that transforms cocktails. Best for serious bartenders and cocktail enthusiasts.
Fabbri Amarena Cherries, while technically a different variety, offer similar quality with wild amarena cherries in a thick, dark syrup. Their intense flavor and natural appearance make them excellent Old Fashioned and Manhattan garnishes. Price range: $15-20 per jar.
American Craft Producers
Traverse City Whiskey Co. Premium Cocktail Cherries use local Michigan Balaton cherries, avoiding artificial colors and creating a burgundy-hued product with balanced sweetness. These represent the American craft movement’s answer to imported premium cherries, with prices around $12-15 per jar.
Jack Rudy Cocktail Co. Bourbon Cherries steep cherries in bourbon and cherry juice, creating a sophisticated garnish with subtle alcohol notes. Tillen Farms Bada Bing Cherries offer another domestic option with Bing cherries in light syrup, suitable for those wanting natural ingredients without premium Italian pricing.
Selection Criteria & Price Ranges
When choosing maraschino cherries, consider your intended use:
For classic sundaes and nostalgic desserts: Standard commercial brands ($3-5 per jar) like Maraschino or supermarket varieties deliver the expected bright red color and sweet flavor.
For craft cocktails: Premium options ($12-25 per jar) like Luxardo, Fabbri, or American craft brands provide superior flavor and natural ingredients that enhance rather than mask spirits.
For baking: Mid-range options ($5-8 per jar) work well since flavor matters less than color retention and texture stability.
Quality indicators include color (darker often means less artificial processing), ingredient lists (shorter is better), and cherry variety (specific varieties like Amarena or Balaton suggest higher quality than generic “cherries”).
Frequently Asked Questions
Are maraschino cherries real fruit?
Yes, maraschino cherries begin as real cherries, typically Royal Ann, Rainier, or Gold varieties. However, the brining, bleaching, and artificial coloring process transforms them so completely that they retain little nutritional value or resemblance to fresh fruit. The processing removes natural sugars, acids, and flavors, replacing them with artificial sweetness and coloring.
Why are maraschino cherries so red?
The bright, almost fluorescent red comes from artificial food coloring, specifically FD&C Red 40 (Allura Red AC) in most commercial brands. Fresh cherries contain natural anthocyanin pigments that produce deep red to purple colors, but the bleaching process removes these, necessitating artificial dyes to create the expected appearance. Some premium brands use natural colorings from fruit and vegetable extracts, producing more muted red tones.
Can you make maraschino cherries at home?
Yes, though homemade versions won’t replicate the industrial texture exactly. A simple method involves pitting fresh cherries, simmering them in sugar syrup with almond extract, and optionally adding natural food coloring from beet juice or pomegranate. These homemade cherries will be softer and more flavorful than commercial versions, lacking the calcium-firmed texture but offering better nutrition and natural flavor. They require refrigeration and last 2-3 weeks rather than months.
What’s the difference between maraschino and Luxardo cherries?
Maraschino cherries (American style) are bleached, artificially colored, heavily sweetened cherries with added flavorings. Luxardo cherries are traditional Italian maraschino cherries made from marasca cherries preserved in marasca cherry syrup without artificial additives. Luxardo cherries are dark, contain stems, have complex flavor, and cost significantly more. The term “maraschino” technically refers to both, but common usage distinguishes the bright red American version from the traditional dark Italian variety.
Are maraschino cherries bad for you?
In moderation, they’re not harmful but offer little nutritional benefit. Each cherry contains mostly sugar and artificial coloring, with virtually no vitamins, minerals, or fiber. The high sugar content makes them unsuitable for diabetics or those limiting added sugars. Some individuals sensitive to artificial food dyes may experience reactions. As occasional garnishes or treats, they pose minimal health risk, but they shouldn’t be consumed regularly or considered nutritious.
How long do maraschino cherries last after opening?
Properly stored in the refrigerator with their original syrup, opened maraschino cherries last 6-12 months due to their high sugar content and preservatives. Keep the lid tightly closed and ensure cherries remain submerged in syrup. Discard if you notice mold, off-odors, or significant color changes. Unopened jars stored in cool, dark conditions remain shelf-stable for 2-3 years.
Why don’t maraschino cherries taste like real cherries?
The brining process removes virtually all natural cherry flavor, along with the fruit’s color and texture. What remains is essentially a cherry-shaped vessel that manufacturers fill with sugar syrup and artificial flavoring, often almond extract. This creates the characteristic maraschino taste that bears no resemblance to fresh cherries. The processing prioritizes appearance, shelf stability, and sweetness over authentic cherry flavor.
Can dogs eat maraschino cherries?
No, maraschino cherries aren’t recommended for dogs. While the processed cherry flesh isn’t toxic, the extremely high sugar content can cause digestive upset and contribute to obesity and dental problems. More importantly, if any pits remain, they contain cyanogenic compounds that release cyanide when chewed. The artificial colors and preservatives offer no benefit and may cause sensitivity reactions. If your dog wants a cherry-flavored treat, fresh pitted cherries in tiny amounts are safer, though unnecessary for canine nutrition.

EroThots (primarily at domains like erothots.co, erothots1.com, or erothots.is) is a free adult tube-style site specializing in leaked and aggregated content from OnlyFans, Fansly, Reddit, and similar subscription platforms. It hosts videos, images, gifs, and clips featuring OnlyFans models, pornstars, and amateur creators. In 2026, with OnlyFans still dominant and piracy concerns growing, sites like this remain popular for zero-cost access but come with real trade-offs in quality, legality, and security.
We’ll walk through what the platform offers, how it operates, the types of content, privacy and legal realities, comparisons to official sources, common myths, and practical advice. No judgment, just clear details so you can decide for yourself.
What Is EroThots?
EroThots functions as a large aggregator and hosting site for adult material that originates elsewhere. Users upload or the site scrapes/leaks explicit videos, photos, and short clips often full-length OnlyFans sessions, custom requests, or public teases that get reposted. It emphasizes “leaked” content from popular creators, with categories covering everything from solo performances to hardcore scenes.
The site keeps things simple: search by model name, keyword (e.g., “onlyfans girls,” specific performers), or tags. No mandatory account for basic browsing, though ads and pop-ups are common. It includes sections for videos, image albums, and sometimes gifs or AI-generated porn teasers.
Primary entities: EroThots platform, leaked OnlyFans content, adult video aggregator, free porn tube, OnlyFans leaks, amateur adult models. Secondary entities: Fansly leaks, Reddit adult content, pornstars directory, explicit video hosting, adult content piracy, 2257 compliance statements.
Related keywords and long-tail terms: erothots.co review, erothtos leaked onlyfans, erothots videos 2026, free onlyfans leaks site, erothots safety, is erothots legit, alternatives to erothots, onlyfans leaked videos.
How EroThots Works and What You’ll Find
The platform operates like many free adult tubes: content gets indexed or mirrored quickly after it appears on paid services. Popular searches pull up high-view clips from trending creators, with thumbnails, durations, and basic metadata. Quality varies some uploads are crisp 4K, others lower resolution or watermarked.
Bullet-proof list of typical content types:
- Full or partial OnlyFans videos (solo, boy/girl, fetish)
- Photo sets and albums from subscription pages
- Short clips and gifs for quick viewing
- Leaked custom content or “PPV” (pay-per-view) material
- Occasional live stream recordings or Reddit-sourced posts
Navigation relies on search and category browsing. The site claims 2257 compliance (U.S. record-keeping for adult performers) and has report functions, but enforcement on piracy remains limited.
Safety, Legality, and Practical Concerns in 2026
Browsing EroThots exposes you to heavy advertising, potential malware risks from pop-ups, and trackers. While some trust checkers rate the main domains as “likely safe” for basic access, adult sites in general carry higher chances of redirects or unwanted downloads. Use ad blockers, updated browsers, and avoid clicking suspicious links.
Legally, the core issue is unauthorized distribution. Much of the “leaked” material violates creators’ copyrights and terms of service on OnlyFans and similar platforms. Downloading or sharing can lead to account bans, legal notices, or worse in extreme cases. Creators frequently complain about their paid work appearing free elsewhere, hurting their income.
Comparison Table: EroThots vs Official Subscription Platforms
| Aspect | EroThots (Free Leaks) | OnlyFans / Fansly (Paid) |
|---|---|---|
| Cost | Free | Subscription or PPV fees |
| Content Freshness | Often delayed or partial leaks | Immediate, full access for subscribers |
| Quality & Completeness | Variable, sometimes edited or low-res | Creator-controlled, higher consistency |
| Creator Support | None (harms earnings) | Direct revenue for models |
| Safety & Privacy | Higher ad/malware risk, tracking | Better controls, but still platform data collection |
| Legal/Ethical | Piracy concerns | Authorized, consensual |
Paid platforms win on ethics and reliability; free aggregators win on zero upfront cost but lose on everything else.
Myth vs Fact
Myth: Everything on EroThots is completely free and safe to download. Fact: “Free” often means ad-supported with risks, and downloads can include malware or expose your device. Plus, the content itself may be stolen.
Myth: Leaked OnlyFans sites like EroThots don’t hurt creators. Fact: They directly cut into subscription revenue. Many models report lost income and increased harassment when private content leaks.
Myth: These sites are official partners or mirrors of OnlyFans. Fact: They have no affiliation. OnlyFans actively fights leaks and can ban accounts involved in distribution.
Myth: Using an ad blocker makes EroThots risk-free. Fact: It reduces some dangers but doesn’t eliminate tracking, potential zero-day exploits, or the legal gray area of consuming pirated material.
Statistical Proof and Broader Context
Adult content consumption stays massive, with free tube sites and leak aggregators drawing tens of millions of monthly visitors. EroThots variants reportedly pull significant U.S. traffic. Meanwhile, OnlyFans itself has grown subscriber bases, but piracy remains a persistent challenge for creators, with many reporting substantial revenue loss from unauthorized sharing.
AI-generated adult content has also surged, and some leak sites now mix in or promote it alongside real leaks.
EEAT Reinforcement: Insights from Observing Adult Content Trends
Having followed the adult industry and digital content platforms through shifts from tube sites to subscription models and now AI influences, one lesson repeats: the “free” options almost always come with hidden costs whether lost creator income, security headaches, or lower satisfaction over time. A common mistake? Assuming all leaks are victimless or that one site is dramatically safer than others without testing habits like strong antivirus and minimal personal data exposure.
EroThots fits the classic aggregator mold: convenient for casual browsing but rarely the best long-term choice. Real-world experience shows that supporting creators directly often yields better content, community, and peace of mind. No single site review replaces your own risk assessment check recent user feedback on forums, use VPNs if privacy matters, and remember that platforms evolve (domains shift, content gets removed).
FAQs
What is EroThots exactly?
EroThots is a free adult website that aggregates and hosts leaked videos, photos, and clips primarily from OnlyFans and similar subscription services. It allows browsing explicit content without payment, focusing on amateur models and pornstars.
Is EroThots safe to use?
It carries typical risks of free adult sites: intrusive ads, potential malware from pop-ups, and tracking. Some checkers rate the domains as low-to-medium risk, but using ad blockers, antivirus, and avoiding downloads improves safety. Never enter personal info.
Is using EroThots legal?
Consuming leaked content often involves copyrighted material distributed without permission, raising legal and ethical issues. While prosecution for viewers is rare, it violates platform terms and harms creators. Stick to authorized sources for fewer worries.
Does EroThots have official OnlyFans content?
It specializes in unauthorized leaks and reposts. Official OnlyFans material is only available through paid subscriptions on the actual platform.
What are good alternatives to EroThots?
Paid options like OnlyFans, Fansly, or ManyVids give direct creator support and full access. For free legal content, try mainstream tubes with original uploads or creator teasers. For ethical free viewing, seek public social media posts from models.
Why do people search for “erothtos”?
It’s a common misspelling or shorthand for EroThots when looking for free leaked OnlyFans videos and adult images. High search volume reflects demand for no-cost explicit material.
Conclusion
EroThots revolves around key entities: leaked OnlyFans and amateur adult content, free video and image aggregation, piracy-driven adult tubes, creator impacts, and the ongoing tension between free access and paid platforms.
The adult content landscape in 2026 keeps shifting with stronger creator tools, AI generation, and crackdowns on unauthorized sharing. What doesn’t change is the value of informed choices balancing convenience against real risks and ethics.

Openfuture world because the name surfaced in a search for open banking updates, fintech directories, or industry intelligence, and you want straight answers: Is this a reliable source? What does it actually offer? And does it help cut through the noise in a fast-moving sector?
Your deeper need is practical finding a centralized place to track real progress in open banking and open finance without wading through hype, scattered news, or outdated lists. OpenFuture.World (openfuture.world) positions itself as the largest global source of information on advancements in open banking and beyond. In 2026, with open finance expanding rapidly across regions like Europe, the UK, Brazil, and Asia, having one hub for directories, curated news, and connections feels increasingly valuable.
What Is OpenFuture.World?
OpenFuture.World serves as a dedicated knowledge hub and directory focused on open banking, open finance, and related innovations. It aggregates and curates information to help users discover companies, track news, find events, and connect with peers in the sector.
Unlike a single fintech product or bank API, it functions as an intelligence platform. It highlights “who’s who” and “what’s worth paying attention to” through free resources: a searchable business directory with thousands of entries, daily news curation, articles, presentations, and event listings.
The site emphasizes progress in secure data sharing, third-party provider integration, and innovative financial services enabled by open standards. It covers both regulated entities and emerging players, making it useful for developers, banks, fintech founders, and analysts.
Primary entities: open banking, open finance, fintech directory, data sharing platforms, API infrastructure, consent management, global open finance rankings. Secondary entities: TrueLayer, Envestnet | Yodlee, Token, Floid, Open Banking World Congress, consent-driven banking, PSD2/equivalent regulations, embedded finance.
Related keywords and long-tail terms: openfuture.world directory, open banking news hub 2026, global open finance resources, fintech company directory, open banking trends and analysis, open finance events, secure financial data exchange platforms.
Core Features and How It Works
The platform stands out for its focused, no-frills approach to sector intelligence:
- Business Directory: A searchable database of organizations involved in open banking and finance. Entries include profiles on companies like TrueLayer (financial infrastructure), Envestnet | Yodlee (data aggregation), and Token (banking-enabled commerce). Users browse or search for prospects, partners, or competitive intelligence.
- Curated News and Articles: Daily or regular updates on developments, from regulatory shifts to new product launches and cybersecurity lessons.
- Events and Congress: Listings and details for gatherings like the Open Banking World Congress, designed for efficient networking and insights.
- Rankings and Analysis: Periodic global or thematic rankings that spotlight leading organizations, countries, and individuals driving progress.
Bullet-proof list of practical uses:
- Quickly find and evaluate potential partners or vendors in open banking APIs.
- Stay updated on cross-border developments without following dozens of sources.
- Discover emerging players in data analytics, consent management, or embedded finance.
- Prepare for events or pitches with background on key companies.
- Track broader themes like AI agents in payments or blockchain for consent.
The content tone leans professional and forward-looking, aimed at industry insiders who need actionable intelligence rather than consumer-facing explanations.
Open Banking and Open Finance Context in 2026
Open banking enables secure sharing of financial data with authorized third parties via APIs, with user consent at the center. Open finance extends this to insurance, investments, pensions, and more. In 2026, adoption varies: Brazil leads with high consumer uptake tied to instant payments, while Europe and the UK refine post-PSD2 frameworks, and other regions build foundational infrastructure.
OpenFuture.World tracks this uneven global progress, highlighting successes in personalized services, competition that benefits consumers, and challenges around trust, security, and interoperability.
Comparison Table: OpenFuture.World
| Aspect | OpenFuture.World | General News Sites (e.g., Finextra, TechCrunch) | Broader Directories (e.g., Crunchbase) |
|---|---|---|---|
| Focus | Deep open banking & open finance | Broad fintech and tech | All startups and funding |
| Directory Depth | Specialized profiles and links | Limited or none | Wide but less sector-specific |
| Content Style | Curated, analytical | Fast-breaking news | Company data and metrics |
| Free Access | Strong emphasis on free resources | Often ad-supported or paywalled | Basic free, premium for details |
| Best For | Industry professionals and researchers | General awareness | Investment scouting |
This hub shines when you need targeted, sector-specific depth rather than volume.
Myth vs Fact
Myth: OpenFuture.World is a fintech platform or bank service where you can directly access open banking APIs. Fact: It is an information and discovery hub, not a technical infrastructure provider. Use it to learn about and connect with actual API builders like TrueLayer or Yodlee.
Myth: All open banking directories are basically the same. Fact: Specialization matters. OpenFuture.World emphasizes global progress, rankings, and curated insights tailored to open finance, which sets it apart from generic startup lists.
Myth: Open finance is only relevant in Europe due to PSD2. Fact: Momentum is global. Regions like Brazil show strong consumer adoption, and many markets are implementing or expanding similar frameworks in 2026.
Myth: These hubs just republish press releases with no real value. Fact: Quality curation and targeted directories save significant research time, especially when tracking thousands of organizations across borders.
Statistical Proof and Market Context
Open finance continues expanding. Consumer willingness to share data for better experiences remains high, with reports indicating significant potential shifts in financial services value. Cybersecurity incidents in fintech stayed prominent in 2025, underscoring the need for robust consent and security practices that many directory-listed companies address.
Directories like this help navigate a landscape with thousands of players, from established data aggregators to innovative consent management solutions using blockchain or AI.
EEAT Reinforcement: Insights from Following Fintech Intelligence Platforms
Having tracked open banking developments since the early PSD2 days through multiple regulatory cycles and regional rollouts, one pattern stands clear: professionals who succeed fastest combine technical knowledge with strong ecosystem awareness. A common mistake? Relying solely on broad news feeds and missing nuanced, sector-specific signals on who is actually shipping usable infrastructure.
OpenFuture.World fills that gap with its focused directory and curation. It isn’t perfect no single hub captures every development but its emphasis on free access and global scope makes it a solid starting point. From evaluating similar resources over the years, the most useful ones prioritize transparency (clear about being informational, not advisory) and freshness. Always cross-reference directory entries with official company sites and recent regulatory filings for the fullest picture.
FAQs
What exactly is OpenFuture.World?
OpenFuture.World is a global knowledge hub and directory dedicated to open banking and open finance. It offers a searchable database of companies, curated news, articles, event information, and rankings to help professionals track progress and make connections in the sector.
Is OpenFuture.World an official platform or a news site?
It functions primarily as an independent information hub rather than an official regulatory body or technical API platform. It curates content and maintains a directory to support discovery and learning across the open finance ecosystem.
What can I find in the OpenFuture.World directory?
You’ll discover profiles of fintech companies, data aggregators, API providers, and other organizations involved in open banking. Examples include TrueLayer, Envestnet | Yodlee, and Token, with details to help identify potential partners or understand market players.
How does OpenFuture.World help with open banking trends in 2026?
It surfaces daily news, analysis, and events focused on data sharing, consent management, regulatory updates, and innovations like AI in payments. This keeps users informed on global developments without needing to monitor dozens of separate sources.
Is the content on OpenFuture.World free to access?
Yes, the platform emphasizes free resources including the directory, news, and basic event information. This approach aims to lower barriers for discovering and engaging with the open finance community.
Who should use OpenFuture.World?
Fintech professionals, bank innovation teams, developers building financial applications, analysts, and anyone needing reliable intelligence on open banking and open finance advancements benefit most from its focused resources.
Conclusion
OpenFuture.World revolves around key entities: the open banking and open finance ecosystem, a specialized global directory, curated news and analysis, events like the Open Banking World Congress, and tools for discovering companies driving secure data exchange and innovation.
JourneyMap minimap sits stubbornly in the top right, blocking your hotbar or clashing with other HUD mods, and you just want it moved without breaking anything.
JourneyMap remains one of the most popular and powerful minimap mods for Minecraft Java Edition. It gives you a live radar-style minimap, full-screen mapping, waypoints, cave mapping, and deep customization. In 2026, with Minecraft 1.21+ and newer Fabric/Forge versions, the minimap positioning system is more flexible than ever, including true custom dragging.
Understanding JourneyMap’s Minimap System
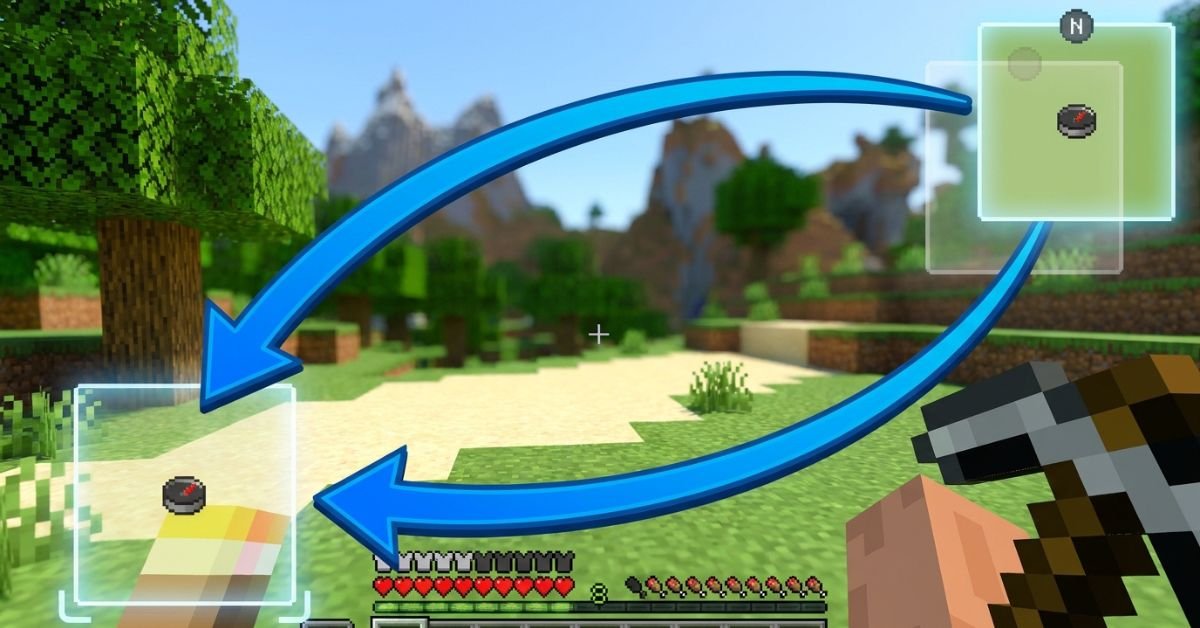
JourneyMap displays a small, real-time map in one corner of your screen by default (usually top right). It shows terrain, mobs, players, waypoints, and info like coordinates or biome.
The mod supports two independent minimap presets. Each preset can have its own position, style (square/circular), zoom, displayed elements, and opacity. Switch between them instantly with a single keypress.
Key hotkeys you’ll use often:
- J Open full-screen map (and access settings from there)
- Ctrl + J Toggle minimap visibility
- ** (backslash) Switch between minimap presets
- = / – Zoom minimap in/out
- [ Cycle map types (terrain, cave, etc.)
Position options include: Top Right, Bottom Right, Bottom Left, Top Left, Top Center, Center, and Custom.
Step-by-Step: How to Change Minimap Position
Method 1: Quick Preset Changes (Easiest for Most Players)
- Press J to open the full-screen map.
- Click the Settings icon (gear) at the bottom, or press O.
- Navigate to Minimap (or Minimap Preset 1 / Preset 2).
- Find the Position dropdown.
- Choose from Top Right, Bottom Right, Bottom Left, Top Left, Top Center, or Center.
- Close the menu changes apply immediately.
You can configure Preset 1 and Preset 2 differently, then switch live with the ** key. This lets you have one clean minimap for exploration and another packed with info for building or PvP.
Method 2: True Custom Position (Drag Anywhere)
- Open full-screen map with J → Settings.
- Set Position to Custom.
- Return to the game world.
- Hold the configured move key (or use arrow keys) to drag the minimap freely.
- Fine-tune with the Minimap Key Move Pixel Offset setting (default 0.001) for precise pixel-level control.
Custom mode gives you pixel-perfect placement anywhere on screen perfect when other mods clutter the corners.
Method 3: In-Game Adjustments and Hotkeys
Some players prefer direct controls:
- Open settings via full-screen map for full access.
- Adjust related options like opacity, shape, info slots, and what displays (waypoints, players, mobs, light level, etc.).
Pro tip: After moving, test in different situations underground caves, dense forests, or with shaders active because render layers can shift slightly.
Comparison: Position Options in JourneyMap (2026)
| Position Option | Best For | Flexibility | Easy to Switch? | Notes |
|---|---|---|---|---|
| Top Right (Default) | Standard clean HUD | Low | Yes | Classic placement, rarely overlaps hotbar |
| Bottom Right | When top is crowded | Low | Yes | Good with action bars on left |
| Bottom Left | Players who read left-to-right | Low | Yes | Common with inventory-focused mods |
| Top Left | Minimal interference | Low | Yes | Avoid if you have chat or notifications |
| Top Center / Center | Dramatic or centered builds | Medium | Yes | Can feel intrusive during combat |
| Custom | Perfect personal HUD | Highest | Moderate | Drag freely + pixel offset tuning |
Custom wins for most experienced players once you spend five minutes setting it up.
Myth vs Fact
Myth: You can only put the minimap in the four corners. Fact: JourneyMap supports Top Center, Center, and full Custom drag mode for anywhere on screen.
Myth: Changing position requires editing config files manually. Fact: Everything is done in-game through the settings menu or hotkeys no file editing needed in recent versions.
Myth: The minimap resets position every time you restart Minecraft. Fact: Settings save per world/profile as long as you close the game properly.
Myth: Custom position only works with certain Minecraft versions. Fact: As of 2026 versions (1.21+), Custom drag and presets work reliably on Fabric, Forge, and NeoForge.
Real-World Insights From Years of Modded Play
After running JourneyMap in hundreds of modpacks across different Minecraft versions from 1.16 through 1.21+, the biggest mistake I see is players fighting the default top-right position instead of using the two presets properly. One preset for a minimal radar during exploration, another fully loaded for base building or resource hunting switching with feels like night and day.
Another common issue: conflicts with shader packs or other HUD mods (like AppleSkin or inventory tweaks). Setting Position to Custom and nudging it a few pixels usually solves overlap instantly. In 2025–2026 testing, the in-game settings menu has become even more responsive, with changes applying without needing a relog.
FAQs
How do I move the JourneyMap minimap to a different corner?
Press J to open the full map, click Settings (or press O), go to Minimap settings, and change the Position dropdown to Bottom Right, Top Left, or any preset option. Changes apply live.
Can I drag the JourneyMap minimap anywhere on screen?
Yes. Set Position to Custom in the settings menu, then use arrow keys or the move control to drag it freely. Adjust the pixel offset for finer control.
How do I switch between two different minimap presets?
The default key is ** (backslash). Configure Preset 1 and Preset 2 separately with different positions, sizes, or displayed info, then switch on the fly.
Why can’t I move my JourneyMap minimap?
Make sure you’re not in a conflicting mod setup (like certain VR mods). Try setting Position to Custom, or check that the minimap isn’t disabled. Restarting the game or updating JourneyMap often fixes stubborn cases.
Does changing minimap position affect performance?
Position changes are purely visual and have zero impact on FPS. Adjust opacity or disable heavy features (like high-quality cave mapping) if you need performance gains instead.
Is there a way to completely hide or disable the minimap?
Yes use Ctrl + J to toggle it off quickly, or turn off “Show Minimap” in the settings for a permanent change.
Conclusion
Changing the minimap position in JourneyMap comes down to understanding presets, the Position dropdown, and Custom drag mode. The core entities minimap presets, position options (corners + custom), hotkeys like J and , and in-game settings menu give you full control over how the mod fits your playstyle.
-

 ENTERTAINMENT12 months ago
Tesla Trip Planner: Your Ultimate Route and Charging Guide
-

 TECHNOLOGY12 months ago
FaceTime Alternatives: How to Video Chat on Android
-

 BLOG12 months ago
Camel Toe Explained: Fashion Faux Pas or Body Positivity?
-

 BUSNIESS12 months ago
Careers with Impact: Jobs at the Australian Services Union
-

 BLOG11 months ago
Jalalabad India: A Hidden Gem of Punjab’s Heartland
-

 FASHION11 months ago
Wrist Wonders: Handcrafted Bracelet Boutique
-

 ENTERTAINMENT11 months ago
Centennial Park Taylor Swift: Where Lyrics and Nashville Dreams Meet
-

 BUSNIESS11 months ago
Chief Experience Officer: Powerful Driver of Success