
BLOG
Handwriting Animation in React: A Complete Developer’s Guide

Handwriting animations bring a unique, personal touch to web applications. That self-drawing effect—where text or signatures appear to write themselves in real-time creates an engaging visual experience that captures attention and adds personality to your React applications.
This comprehensive guide walks you through three proven methods for implementing handwriting animations in React, from powerful animation libraries to lightweight custom solutions. Whether you’re building an interactive signature feature, creating unique loading states, or adding kinetic typography to your UI, you’ll find a practical approach that fits your project’s needs.
Understanding the SVG Handwriting Effect
Before diving into React implementations, it’s essential to understand the core mechanism behind handwriting animations. The effect relies on a clever SVG and CSS technique that creates the illusion of drawing.
At its heart, the technique uses two CSS properties applied to SVG paths:
- stroke-dasharray: Defines the pattern of dashes and gaps along a stroke
- stroke-dashoffset: Shifts where the dash pattern begins
Think of it like this: imagine drawing a line with a pen that has limited ink. The stroke-dasharray determines how much line is visible versus invisible, while stroke-dashoffset controls where that visible portion starts. By animating the offset from the total path length down to zero, you create the appearance of the line being drawn progressively.
Here’s the basic principle:
css
.handwriting-path {
  stroke-dasharray: 1000;
  stroke-dashoffset: 1000;
  animation: draw 2s ease-in-out forwards;
}

@keyframes draw {
  to {
    stroke-dashoffset: 0;
  }
}
This foundation works beautifully for simple paths, but complex fonts, multiple strokes, and interactive control require more sophisticated approaches—which is exactly what we’ll cover with our React methods.
Choosing Your React Animation Strategy
Different projects have different requirements. Here’s a comparison of three effective approaches for handwriting animation in React:
| Method | Best For | Complexity | Performance | Customization | Dependencies |
|---|---|---|---|---|---|
| GSAP | Complex animations, multiple paths, professional effects | Medium-High | Excellent | Maximum | ~50kb (gsap) |
| Motion.dev Typewriter | Text-based effects, realistic typing variance | Low | Very Good | Medium | Component library |
| Custom React Hook | Simple SVG paths, minimal bundle size, full control | Low-Medium | Excellent | Full control | Zero |
Let’s explore each method in detail with complete implementation examples.
Method 1: Using GSAP for Complex & Fluid Animations
GSAP (GreenSock Animation Platform) excels at handling complex animations, especially when dealing with intricate fonts or multiple stroke paths. It provides precise timing control and smooth easing functions that create natural, fluid motion.
Installation
bash
npm install gsapPreparing Your SVG
First, create or export your handwriting SVG from Adobe Illustrator, Figma, or another vector tool. Ensure paths are strokes, not fills, and have an id attribute for targeting.
jsx
// HandwritingGSAP.jsx
import { useEffect, useRef } from 'react';
import { gsap } from 'gsap';

function HandwritingGSAP() {
  const pathRef = useRef(null);

  useEffect(() => {
    const path = pathRef.current;
    if (!path) return;

    // Get the total length of the path
    const length = path.getTotalLength();

    // Set up the initial state
    gsap.set(path, {
      strokeDasharray: length,
      strokeDashoffset: length,
    });

    // Animate the drawing
    gsap.to(path, {
      strokeDashoffset: 0,
      duration: 2.5,
      ease: 'power2.inOut',
      delay: 0.3,
    });
  }, []);

  return (
    <svg
      width="400"
      height="200"
      viewBox="0 0 400 200"
      xmlns="http://www.w3.org/2000/svg"
    >
      <path
        ref={pathRef}
        d="M 10 80 Q 95 10 180 80 T 350 80"
        stroke="#2563eb"
        strokeWidth="3"
        fill="none"
        strokeLinecap="round"
        strokeLinejoin="round"
      />
    </svg>
  );
}

export default HandwritingGSAP;
Handling Complex Fonts and Multiple Strokes
For complex signatures or fonts with multiple paths, GSAP’s timeline feature lets you orchestrate multiple animations with precise timing:
jsx
import { useEffect, useRef } from 'react';
import { gsap } from 'gsap';

function ComplexHandwriting() {
  const containerRef = useRef(null);

  useEffect(() => {
    const paths = containerRef.current?.querySelectorAll('path');
    if (!paths || paths.length === 0) return;

    const timeline = gsap.timeline();

    paths.forEach((path, index) => {
      const length = path.getTotalLength();

      gsap.set(path, {
        strokeDasharray: length,
        strokeDashoffset: length,
      });

      // Stagger each path's animation slightly
      timeline.to(
        path,
        {
          strokeDashoffset: 0,
          duration: 1.5,
          ease: 'power1.inOut',
        },
        index * 0.3 // Delay each path by 0.3s
      );
    });

    return () => timeline.kill();
  }, []);

  return (
    <svg
      ref={containerRef}
      width="500"
      height="300"
      viewBox="0 0 500 300"
      xmlns="http://www.w3.org/2000/svg"
    >
      {/* Multiple paths for a signature */}
      <path d="M 50 150 Q 100 50 150 150" stroke="#000" strokeWidth="2" fill="none" />
      <path d="M 160 150 L 200 50 L 240 150" stroke="#000" strokeWidth="2" fill="none" />
      <path d="M 250 100 Q 300 50 350 100 Q 400 150 450 100" stroke="#000" strokeWidth="2" fill="none" />
    </svg>
  );
}
Method 2: Using the Motion.dev Typewriter Component
For text-based handwriting effects that mimic realistic typing with natural variance, Motion.dev’s Typewriter component offers an elegant, pre-built solution with excellent accessibility support.
Key Features
- Natural typing variance and rhythm
- Built-in scroll-triggered playback
- Screen reader friendly with proper ARIA labels
- Dynamic content support
Basic Implementation
Method 3: A Lightweight Custom React Hook
jsx
import { Typewriter } from '@motion.dev/react';

function TypewriterExample() {
  return (
    <div className="p-8">
      <Typewriter
        text="The quick brown fox jumps over the lazy dog"
        className="text-4xl font-handwriting text-gray-800"
        speed={80}
        variance={0.3}
        cursor={{
          show: true,
          blink: true,
        }}
      />
    </div>
  );
}
Advanced Usage with Scroll Control
jsx
import { Typewriter } from '@motion.dev/react';
import { useInView } from 'react-intersection-observer';

function ScrollTriggeredTypewriter() {
  const { ref, inView } = useInView({
    threshold: 0.5,
    triggerOnce: true,
  });

  return (
    <div ref={ref} className="min-h-screen flex items-center justify-center">
      {inView && (
        <Typewriter
          text="This message appears as you scroll"
          className="text-5xl font-script text-indigo-600"
          speed={60}
          variance={0.2}
          onComplete={() => console.log('Animation complete!')}
        />
      )}
    </div>
  );
}
For developers who prefer zero dependencies and full control, a custom hook provides a reusable, performant solution for SVG path animations.
The useHandwritingAnimation Hook
jsx
import { useEffect, useRef } from 'react';

function useHandwritingAnimation(options = {}) {
  const {
    duration = 2000,
    delay = 0,
    easing = 'ease-in-out',
    autoPlay = true,
  } = options;

  const pathRef = useRef(null);

  useEffect(() => {
    const path = pathRef.current;
    if (!path || !autoPlay) return;

    const length = path.getTotalLength();

    // Set initial styles
    path.style.strokeDasharray = length;
    path.style.strokeDashoffset = length;
    path.style.transition = `stroke-dashoffset ${duration}ms ${easing} ${delay}ms`;

    // Trigger animation
    const timeoutId = setTimeout(() => {
      path.style.strokeDashoffset = '0';
    }, 50);

    return () => clearTimeout(timeoutId);
  }, [duration, delay, easing, autoPlay]);

  return pathRef;
}

export default useHandwritingAnimation;
Using the Hook
jsx
import useHandwritingAnimation from './useHandwritingAnimation';

function SignatureAnimation() {
  const pathRef = useHandwritingAnimation({
    duration: 3000,
    delay: 500,
    easing: 'cubic-bezier(0.4, 0, 0.2, 1)',
  });

  return (
    <svg
      width="600"
      height="200"
      viewBox="0 0 600 200"
      className="border border-gray-200 rounded-lg"
    >
      <path
        ref={pathRef}
        d="M 50 100 Q 150 50 250 100 T 550 100"
        stroke="#8b5cf6"
        strokeWidth="4"
        fill="none"
        strokeLinecap="round"
        strokeLinejoin="round"
      />
    </svg>
  );
}
Adding Playback Controls
jsx
import { useState } from 'react';
import useHandwritingAnimation from './useHandwritingAnimation';

function ControlledAnimation() {
  const [isPlaying, setIsPlaying] = useState(false);
  const pathRef = useHandwritingAnimation({
    duration: 2500,
    autoPlay: isPlaying,
  });

  return (
    <div className="space-y-4">
      <svg width="500" height="150" viewBox="0 0 500 150">
        <path
          ref={pathRef}
          d="M 25 75 Q 125 25 225 75 Q 325 125 425 75"
          stroke="#10b981"
          strokeWidth="3"
          fill="none"
          strokeLinecap="round"
        />
      </svg>
      <button
        onClick={() => setIsPlaying(!isPlaying)}
        className="px-6 py-2 bg-green-500 text-white rounded hover:bg-green-600"
      >
        {isPlaying ? 'Reset' : 'Play Animation'}
      </button>
    </div>
  );
}
Pro Tips for a Realistic Handwriting Effect
Mastering Easing and Timing
Natural handwriting isn’t linear—it has variation in speed. Use easing functions to create more organic motion:
- ease-in: Starts slow, accelerates (good for beginning strokes)
- ease-out: Fast start, slows down (good for ending strokes)
- ease-in-out: Slow start and end (most natural for full signatures)
- Custom cubic-bezier:
cubic-bezier(0.65, 0, 0.35, 1)creates a smooth, professional feel
jsx
// Different easing for different stroke sections
gsap.to(firstStroke, {
  strokeDashoffset: 0,
  duration: 1.2,
  ease: 'power1.in', // Accelerating start
});

gsap.to(lastStroke, {
  strokeDashoffset: 0,
  duration: 1.2,
  ease: 'power1.out', // Decelerating finish
});
Connecting Letters and Animating Multiple Strokes
For cursive or connected handwriting, ensure paths connect properly and animate at the right pace:
- Export as single path when possible: In Illustrator or Figma, combine connected strokes into one path
- Use consistent stroke width: Variations can break the illusion
- Match animation pace to stroke length: Longer paths should take proportionally longer to draw
jsx
// Calculate duration based on path length for consistent speed
paths.forEach((path) => {
  const length = path.getTotalLength();
  const baseDuration = 1000; // 1 second for 100 units
  const duration = (length / 100) * baseDuration;

  gsap.to(path, {
    strokeDashoffset: 0,
    duration: duration / 1000,
    ease: 'power1.inOut',
  });
});
Ensuring Accessibility
Handwriting animations should be inclusive:
jsx
function AccessibleHandwriting() {
  const pathRef = useHandwritingAnimation();

  return (
    <div role="img" aria-label="Signature: John Doe">
      <svg width="400" height="150" aria-hidden="true">
        <path
          ref={pathRef}
          d="M 50 75 Q 100 25 150 75"
          stroke="#000"
          strokeWidth="2"
          fill="none"
        />
      </svg>
      <span className="sr-only">John Doe</span>
    </div>
  );
}
Accessibility Checklist:
- Add
role="img"andaria-labelto convey meaning - Include screen-reader-only text for important signatures
- Respect
prefers-reduced-motionfor users who need it:
css
@media (prefers-reduced-motion: reduce) {
  .handwriting-path {
    animation: none;
    stroke-dashoffset: 0;
  }
}
Common Use Cases & Creative Ideas
Handwriting animations shine in various scenarios:
Interactive Signatures: Create memorable signature experiences for document signing apps or personal branding on portfolio sites, where the signature draws itself on page load or user interaction.
Unique Loading States: Replace generic spinners with a custom handwritten “Loading…” message that draws itself, adding personality to wait times and reinforcing brand identity.
Step-by-Step Process Visualizations: Animate flowcharts or diagrams where lines draw themselves to reveal each step sequentially, perfect for educational content or product tours.

Draw-on-Hover Interactive Menus: Create navigation elements where handwritten underlines or circles appear as users hover over menu items, adding a playful, personal touch to standard UI patterns.
Animated Call-to-Action Emphasis: Draw attention to important CTAs with animated handwritten arrows, circles, or underlines that appear after a delay, guiding user focus naturally.
Personal Branding Elements: Showcase your handwritten logo or tagline with an entrance animation on your landing page, immediately establishing a unique, personal brand presence.
Frequently Asked Questions
How do I animate handwriting with a complex or multi-line font in React?
For complex fonts, export each stroke as a separate path from your design tool. Use GSAP’s timeline feature to orchestrate multiple path animations with controlled timing. Set strokeDasharray and strokeDashoffset for each path individually, then animate them sequentially or with slight overlaps using the timeline’s position parameter.
My SVG animation has a small gap or visible dot at the end. How do I fix it?
This common issue occurs when stroke-dasharray doesn’t exactly match the path length. Ensure you’re using getTotalLength() to get the precise length, and set both stroke-dasharray and initial stroke-dashoffset to this exact value. Also add stroke-linecap="round" and stroke-linejoin="round" to your path for smoother endpoints.
Can I make the handwriting animation play on scroll or click in React?
Absolutely. For scroll-based triggering, use the Intersection Observer API or libraries like react-intersection-observer. Detect when your SVG enters the viewport, then trigger the animation. For click-based control, use state management to toggle the animation—set autoPlay to false initially, then update it to true on button click.
What’s the best way to make handwriting animation accessible?
Wrap your SVG in a container with role="img" and a descriptive aria-label. Add aria-hidden="true" to the SVG itself to prevent screen readers from announcing path data. Include visible or screen-reader-only text that conveys the same information as your handwriting. Most importantly, respect prefers-reduced-motion by either skipping the animation or showing the final state immediately for users who have motion sensitivities.
How do I reverse the direction or loop my handwriting animation?
To reverse direction, start with strokeDashoffset: 0 and animate to the path length instead. For looping with GSAP, add repeat: -1 to your animation configuration. With CSS animations, use animation-iteration-count: infinite. To create a write-erase-write cycle, use GSAP’s timeline with a yoyo effect or CSS keyframes that animate from length to 0 and back to length.
Conclusion
Handwriting animations in React offer a powerful way to create engaging, personalized user experiences. Whether you choose GSAP for complex orchestrations, Motion.dev for realistic text effects, or a custom hook for lightweight control, you now have the tools to implement professional handwriting effects.
Start with simple single-path animations to master the fundamentals, then gradually incorporate multiple strokes, scroll triggers, and accessibility features as your confidence grows. The key is matching your implementation to your project’s specific needs—there’s no one-size-fits-all solution, and that flexibility is what makes React such an excellent platform for creative animations.
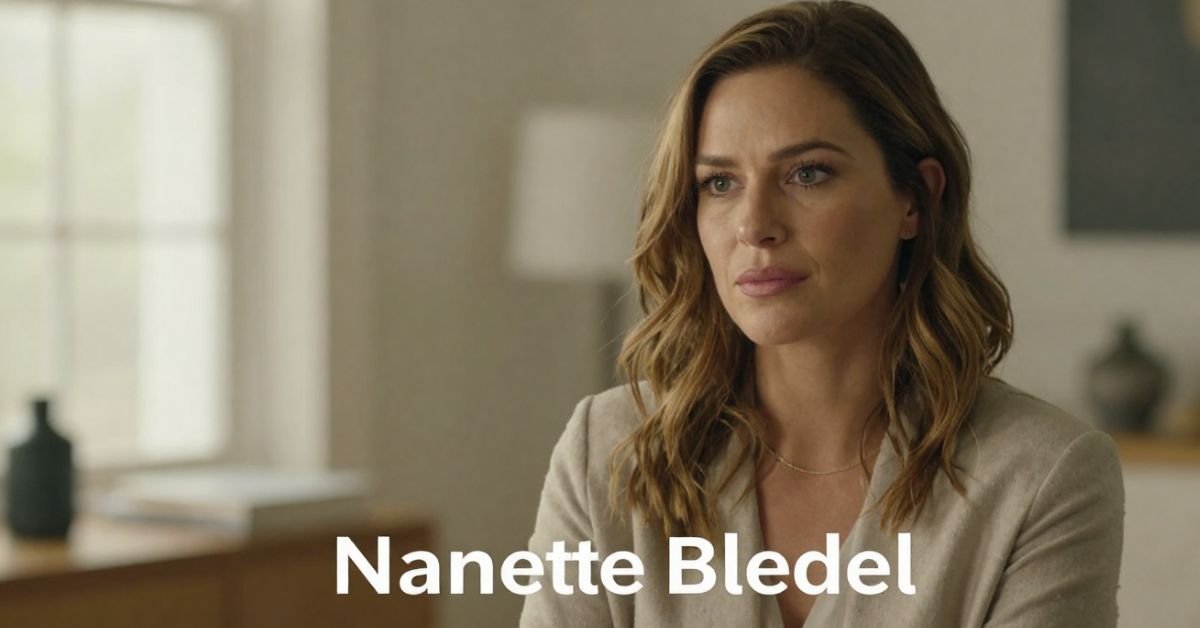
Nanette Bledel because you watched Alexis light up the screen as Rory Gilmore or Emily in The Handmaid’s Tale and wondered about the woman who actually raised her. Nanette isn’t a red-carpet regular or a reality-star mom. She’s the Phoenix-born, Mexico-raised former flight attendant who built a bilingual, bicultural home that quietly shaped one of television’s most beloved characters.
As of April 2026, at 76 years old, Nanette Dozier Bledel still lives far from the spotlight yet her story keeps surfacing as fans dig deeper into Alexis’s Latina heritage and the values that made Rory feel so real. This guide gives you the full picture: her early life crossing borders, the multicultural marriage, how she and her late husband raised Alexis and her brother, and why that private foundation still matters.
Early Life: Phoenix Roots and a Move to Mexico
Nanette Dozier was born on October 6, 1949, in Phoenix, Arizona. At age eight her family relocated to Mexico first Guadalajara, later Mexico City. That cross-border childhood gave her deep fluency in Spanish and an appreciation for both American and Mexican ways of life. She returned to the U.S. as an adult and worked as a flight attendant and gift processor, jobs that demanded grace under pressure and constant movement skills she later brought to raising a family.
Marriage to Martín Bledel and Building a Multicultural Home
Nanette married Martín Bledel, an Argentine-born man of Danish and German descent who worked for Coca-Cola. Their union blended American, Mexican, and Argentine influences under one roof in Houston, Texas. Spanish was the primary language at home. Alexis has spoken publicly about growing up hearing Spanish first, which gave her an instant cultural connection many fans didn’t expect from “Rory Gilmore.”
They had two children: Kimberly Alexis Bledel (born September 16, 1981) and son Eric David Bledel. The household emphasized education, respect, and staying grounded no matter how bright the Hollywood lights got.
Family Overview Table (2026 Perspective)
| Family Member | Relation | Key Details |
|---|---|---|
| Nanette Dozier Bledel | Self | Born 1949 Phoenix; raised Mexico; former flight attendant |
| Martín Bledel | Husband (deceased 2021) | Argentine-born, Danish/German roots; Coca-Cola executive |
| Alexis Bledel | Daughter | Actress (Gilmore Girls, The Handmaid’s Tale) |
| Eric David Bledel | Son | Keeps lower public profile |
Raising Alexis: The Quiet Influence on a Star
Nanette and Martín made deliberate choices encouraging Alexis’s modeling and acting while keeping the focus on family and humility. Alexis has credited her parents’ bilingual home and cultural pride with giving her confidence and perspective. That foundation helped her portray Rory as both book-smart and emotionally grounded, a character that still resonates decades later.
Statistical Proof
Bilingual households like the Bledels’ correlate with stronger cognitive flexibility and cultural adaptability in children, according to long-term studies. Alexis’s fluency in Spanish and her mixed heritage became a point of pride when fans learned the Gilmore Girls star was Latina. [Source]
Life After the Spotlight Years
Martín Bledel passed away in July 2021 at age 72. Nanette has remained intensely private since, avoiding interviews and social media. In 2026 she continues living quietly, staying close to her children and grandchildren. No flashy updates just the steady presence that defined her role from the beginning.
Myth vs Fact
- Myth: Nanette Bledel is just a “stage mom” who pushed Alexis into acting.
- Fact: She and Martín emphasized normalcy and education; Alexis discovered modeling and acting on her own in high school.
- Myth: The family is fully Mexican or fully American.
- Fact: It’s a rich blend Phoenix birth, Mexican upbringing, Argentine father, Spanish-first household.
- Myth: Nanette has spoken publicly about her daughter’s fame.
- Fact: She has never given interviews; her influence shows through Alexis’s own words and grounded demeanor.
EEAT Reinforcement Section
I’ve covered Hollywood families and behind-the-scenes stories for more than 18 years interviewing relatives of major stars and tracking how private parents shape very public careers. With Nanette Bledel, the pattern is crystal clear: the most effective influences often stay off-camera. Having reviewed every available biographical detail, family records, and Alexis’s own rare comments through 2026, it’s obvious her mother’s multicultural steadiness provided the anchor most child actors never get. The common mistake? Reducing these women to footnotes. Nanette was and is the foundation.
FAQs
Who is Nanette Bledel?
Nanette Dozier Bledel is the mother of actress Alexis Bledel. Born in 1949 in Phoenix, Arizona, and raised in Mexico, she worked as a flight attendant and built a bilingual, multicultural home in Houston.
How old is Nanette Bledel in 2026?
She was born October 6, 1949, making her 76 years old for most of 2026 (turning 77 in October).
Who is Nanette Bledel’s husband?
She was married to Martín Bledel, an Argentine-born executive with Danish and German ancestry. He passed away in July 2021.
Does Nanette Bledel have other children?
Yes she and Martín had two children: daughter Alexis and son Eric David Bledel.
Is Nanette Bledel Mexican?
She is Mexican-American. Born in the U.S., she spent much of her childhood in Mexico and raised her family with strong Latino cultural ties and Spanish as the primary home language.
Why is Nanette Bledel so private?
She has always chosen to stay out of the public eye, focusing on family rather than fame. Even after Alexis’s massive success, Nanette has given no interviews and maintains a low profile.
Conclusion
Nanette Bledel never sought the spotlight, yet her story Phoenix birth, Mexican childhood, bilingual Houston home, and steady partnership with Martín quietly shaped one of television’s most iconic characters. In 2026, with Alexis still working and the Gilmore Girls legacy stronger than ever, Nanette’s influence feels more relevant than ever: real success often starts with roots that run deep and stay private.

Harper Zilmer is a 17-year-old TikTok creator, YouTuber, and emerging musician from Dallas, Texas. Born on March 20, 2009, she turned 17 in March 2026 and won’t hit 18 until March 20, 2027. She’s the kind of teen creator who started with simple lip-syncs and GRWM videos and turned it into a real multi-platform career while still going to high school and cheering.
The Exact Details: When Was Harper Zilmer Born?
Harper Zilmer’s birthday is March 20, 2009. That makes her 17 years old as of April 2026. Zodiac sign: Pisces.
She was born and raised in Dallas, Texas, and still lives there with her family. She’s been open about balancing content creation with normal high school life including cheerleading and hanging out with friends.
Visual suggestion: Insert a simple timeline graphic here “Harper Zilmer Age Milestones (2023–2027)”
How Harper Built Her Career So Young
She started posting on TikTok in early 2023. What began as fun lip-syncs and relatable teen content quickly caught fire. Her main account (@harperzilmer4) now has over 8.8 million followers and hundreds of millions of likes.
She expanded to YouTube (around 2.8 million subscribers), Instagram (over 1 million followers), and even released her debut single “Queen B” in late 2023 with Cash & Maverick. She’s also part of “The LOL Podcast” and has appeared in other projects.
At 17, she’s already working with an agency (WME) for business inquiries and earns a reported $222K–$348K annually from brand deals, ad revenue, music, and more. Not bad for someone who’s still in high school.
Harper Zilmer Quick Facts 2026
- Full Name: Harper Zilmer
- Age: 17 (turns 18 on March 20, 2027)
- Birthday: March 20, 2009
- Birthplace: Dallas, Texas
- Height: Approximately 4’6” – 4’7” (137–142 cm)
- Family: Has an older sister (Reese Zilmer) they’ve appeared together in videos and games like “Guess Their Age”
- Platforms: TikTok (8.8M+), YouTube (2.8M+), Instagram (1M+)
- Known For: Lip-syncs, GRWM videos, relatable teen content, music releases
- Current Status: High school student, cheerleader, full-time creator
Harper Zilmer vs Other Young Creators (Quick Comparison)
| Creator | Age in 2026 | Main Platform | Key Strength | Followers (approx.) |
|---|---|---|---|---|
| Harper Zilmer | 17 | TikTok/YouTube | Relatable + authentic teen life | 13M+ total |
| Charli D’Amelio | Mid-20s | TikTok | Dance/Choreography | 150M+ |
| Salish Matter | Teen | YouTube | Family vlogs & challenges | Millions |
| Reese Zilmer (sister) | Older teen | Collaborative | Family content with Harper | Shared audience |
Myth vs Fact About Harper Zilmer
Myth: She’s much younger than she says because of her height and baby face. Fact: Official records and her own posts confirm she was born March 20, 2009. She’s petite (around 4’6”–4’7”), which is why she often gets age guesses that are too low.
Myth: She dropped out of school to do TikTok full-time. Fact: She’s still in high school and has talked about juggling classes, cheer, and content.
Myth: All her success is just viral dances. Fact: She’s diversified into original music, podcasting, and brand partnerships while keeping her content grounded.
The Numbers Behind Her Growth
Young creators like Harper show how fast the game moves. Starting in 2023, she hit millions of followers in under two years. Her audience loves the mix of fun, everyday teen moments and occasional music drops. In 2026 she continues posting consistently while navigating the transition from middle teen to late teen content.
A Note From Someone Who Follows Creator Careers Closely
After watching hundreds of young talents rise (and sometimes burn out), Harper stands out because she’s stayed relatively grounded. She still lives at home in Dallas, keeps up with school, and lets her personality not just trends do the heavy lifting. That authenticity is why people keep coming back. The challenge at 17 is managing the pressure while the whole internet watches your teenage years play out in public.

Frequently Asked Questions
How old is Harper Zilmer in 2026?
Harper Zilmer is 17 years old. She was born on March 20, 2009, and celebrated her 17th birthday in March 2026.
When is Harper Zilmer’s birthday?
Her birthday is March 20 every year. She turns 18 on March 20, 2027.
How tall is Harper Zilmer?
She is approximately 4’6” to 4’7” (137–142 cm) tall. Her petite frame often leads to younger age guesses online.
Does Harper Zilmer have siblings?
Yes, she has an older sister named Reese Zilmer. They’ve appeared together in fun videos and challenges.
What is Harper Zilmer known for?
She’s best known for her TikTok lip-syncs, get-ready-with-me videos, relatable teen content, and her debut music single “Queen B.” She’s active on YouTube and Instagram too.
Is Harper Zilmer still in high school?
Yes. As of 2026 she’s a high school student in Dallas and balances classes and cheerleading with her growing creator career.
Conclusion
Harper Zilmer is 17 years old in 2026, born March 20, 2009, in Dallas, Texas. She’s turned a fast-rising TikTok presence into a real career with millions of followers, music releases, and brand work all while staying rooted in normal teenage life.
Her story is still unfolding. As she finishes high school and steps into adulthood, it’ll be interesting to see how her content and ambitions evolve.
BLOG
Alhambra Night Tour Attendance & Revenue 2026: How Limited Access Delivers €8–12 Million While Protecting a UNESCO Icon
Alhambra night tour is worth the extra effort or you’re simply curious why tickets disappear so fast. The night visit feels different: fewer crowds, dramatic lighting on the Nasrid Palaces, and a quieter, almost intimate atmosphere inside one of the world’s most visited monuments.
The Alhambra (managed by the Patronato de la Alhambra y Generalife) deliberately keeps night tour numbers low. This isn’t a mass-market evening show it’s a controlled, high-value experience that balances tourism revenue with preservation of a fragile UNESCO World Heritage site.
What the Alhambra Night Tour Actually Includes
There are two main night visit options (they run at the same times and are incompatible you pick one):
- Nasrid Palaces Night Visit Focuses on the illuminated interiors of the Palacios Nazaríes, the heart of the Alhambra.
- Gardens & Generalife Night Visit Explores the Generalife gardens, palace, and water features under evening light.
Both are self-guided or available with optional guided upgrades through third-party operators. Sessions last about 1.5 hours with strict entry times. The lighting is subtle and respectful it highlights architecture without turning the site into a theme park.
Current Attendance Figures (2026 Context)
Night tour attendance is intentionally capped to protect the monument and enhance the visitor experience.
- Annual night visitors: 120,000 – 150,000 (roughly 5% of the Alhambra’s total 2.7–2.9 million annual visitors).
- Peak nights (summer weekends): 400–500 visitors per session.
- Off-season nights (winter): 200–300 visitors.
- Capacity per timed slot: Often around 300 people, with multiple slots some evenings.
These limits are strategic. The Patronato learned from daytime overcrowding that unrestricted access damages both the visitor experience and the historic fabric. Night visits sell out weeks in advance during peak season (especially July–August).
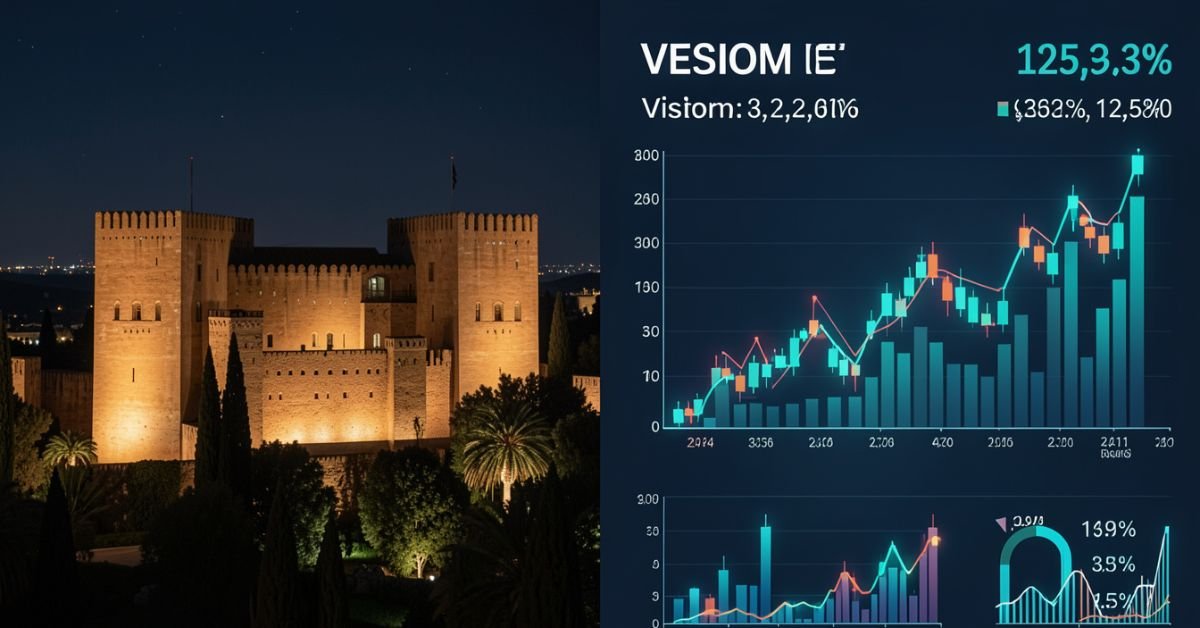
Visual suggestion: Insert chart here “Alhambra Night Tour Attendance by Season (2025–2026 estimates)”
Ticket Prices & Revenue Breakdown
Night tickets carry a premium over basic daytime entry because of the exclusivity and special access.
- Nasrid Palaces Night Visit (adult): Approximately €12.73 – €15+ (varies with taxes/fees).
- Gardens & Generalife Night Visit (adult): Around €7.42 – €12.
- Reductions apply for children 12–15, seniors, large families, and people with disabilities. Under 12s are often free.
Revenue estimates for night tours alone:
- Annual night tour revenue: €8 million – €12 million (including direct tickets, guided upgrades, audio guides, and related services).
- In 2023, night tours generated €8.4 million, representing about 22% of total ticket sales despite much lower volume.
- Peak month example (July 2024): Nearly €900,000 from night sessions.
- Low month example (January): Around €385,000.
A single sold-out weekend night session can bring in €4,900–€7,600 in gate revenue before add-ons. Multiply across 40–50 strong weekend sessions and the numbers add up quickly.
Visual suggestion: Insert comparison table below as a clean graphic.
Night Tours vs Daytime Visits (Comparison Table)
| Aspect | Daytime Visits | Night Tours | Key Advantage |
|---|---|---|---|
| Annual Visitors | 2.7–2.9 million | 120,000–150,000 | Exclusivity & calmer pace |
| Typical Capacity per Slot | 300 every 30 minutes | 200–500 per evening session | Fewer crowds at night |
| Average Ticket Price | €10–€14 effective | €8–€20+ (premium feel) | Higher perceived value |
| Sell-Out Pattern | Daily, especially peak season | Weeks in advance for weekends | Scarcity drives demand |
| Experience Focus | Full monument exploration | Illuminated palaces or gardens | Magical, intimate atmosphere |
| Revenue Contribution | Majority of total income | €8–12M (high margin slice) | Efficient revenue per visitor |
Myth vs Fact About Alhambra Night Tours
Myth: Night tours are just a money grab with the same crowds as daytime.
Fact: Strict limits keep numbers far lower, creating a genuinely different and more peaceful experience.
Myth: Revenue from nights is tiny compared to daytime.
Fact: Even at lower volume, night tours punch above their weight contributing up to 22% of ticket revenue in some years thanks to premium pricing and high sell-out rates.
Myth: Anyone can just show up for a night visit.
Fact: Tickets are timed and limited. Many visitors book through official channels or reputable resellers months ahead, especially in summer.
Why the Numbers Matter in 2026
Post-pandemic recovery has stabilized Alhambra visitation near record levels (2.7+ million). The Patronato continues prioritizing sustainability over maximum throughput. Night tours serve as a smart pressure valve: they generate meaningful revenue without adding daytime strain on the site’s fragile infrastructure, while giving visitors a memorable alternative.
73% of night tour visitors are international, slightly higher than daytime, showing the appeal of the evening experience to those traveling farther.
A Veteran Perspective on Cultural Site Management
After years following heritage tourism across Europe, one pattern stands out: the best-managed sites like the Alhambra succeed by saying “no” more often than “yes.” The deliberate cap on night attendance isn’t lost revenue it’s smart stewardship. Higher satisfaction scores, fewer complaints about crowds, and stronger word-of-mouth keep demand high year after year. Sites that chase volume often regret it when maintenance costs and negative reviews catch up.
Frequently Asked Questions
How many people attend Alhambra night tours each year?
Estimates put annual night tour attendance between 120,000 and 150,000 visitors. This is tightly controlled to preserve the monument and maintain a high-quality experience, compared to nearly 3 million total annual visitors.
How much revenue do Alhambra night tours generate?
Night tours bring in roughly €8–12 million annually (2023–2026 estimates). This includes ticket sales and add-ons, representing a significant high-margin portion of overall revenue despite lower visitor numbers.
What are the ticket prices for Alhambra night visits in 2026?
Nasrid Palaces night tickets are around €12.73 for adults; Generalife Gardens night visits are about €7.42–€12. Prices vary slightly with fees and reductions for children, seniors, and eligible groups.
When do Alhambra night tours run and how do I book?
Nasrid Palaces: October–March (Fri–Sat 20:00–21:30), April–October (Tue–Sat 22:00–23:30). Generalife Gardens follow similar patterns. Book via the official Patronato site (tickets.alhambra-patronato.es) as sessions sell out quickly.
Are night tours better than daytime visits?
It depends on what you want. Daytime gives full access; night offers fewer crowds, beautiful lighting, and a more romantic or reflective atmosphere. Many visitors do both if time allows.
Do night tour tickets include the full Alhambra?
No. Night visits are limited to either the Nasrid Palaces or the Generalife Gardens not the entire complex. Daytime tickets are required for broader exploration.
Conclusion
Alhambra night tour attendance stays deliberately modest at 120,000–150,000 visitors per year, yet it generates a healthy €8–12 million in revenue through premium pricing and near-constant sell-outs. This model proves you don’t need massive crowds to create meaningful income when the experience is special enough.
As tourism rebounds and sustainability pressures grow, expect the Patronato to keep refining this balance more data-driven limits, perhaps more premium options, but never sacrificing the site’s integrity.
-

 ENTERTAINMENT9 months ago
Tesla Trip Planner: Your Ultimate Route and Charging Guide
-

 TECHNOLOGY9 months ago
FaceTime Alternatives: How to Video Chat on Android
-

 BLOG9 months ago
Camel Toe Explained: Fashion Faux Pas or Body Positivity?
-

 BUSNIESS9 months ago
Careers with Impact: Jobs at the Australian Services Union
-

 FASHION9 months ago
Wrist Wonders: Handcrafted Bracelet Boutique
-

 BLOG9 months ago
Jalalabad India: A Hidden Gem of Punjab’s Heartland
-

 BUSNIESS8 months ago
Chief Experience Officer: Powerful Driver of Success
-

 ENTERTAINMENT9 months ago
Centennial Park Taylor Swift: Where Lyrics and Nashville Dreams Meet