Connect with us

TECHNOLOGY

CrunchTech’s Incredible Innovations: 7 Reasons It’s Dominating in 2025

Published

on

CrunchTech’s Incredible Innovations

CrunchTech more than once in 2025. But what exactly is CrunchTech, and why is everyone—from startup founders to Fortune 500 execs—talking about it? Whether you’re a tech enthusiast, an entrepreneur, or just someone curious about the next big thing, this deep dive will answer your burning questions and show you why CrunchTech is making such a massive impact.

What Is CrunchTech? The New Face of Innovation

CrunchTech isn’t just another buzzword. It’s a movement, a platform, and a community all rolled into one. At its core, CrunchTech is about accelerating innovation—helping startups, investors, and tech professionals connect, collaborate, and create the future.

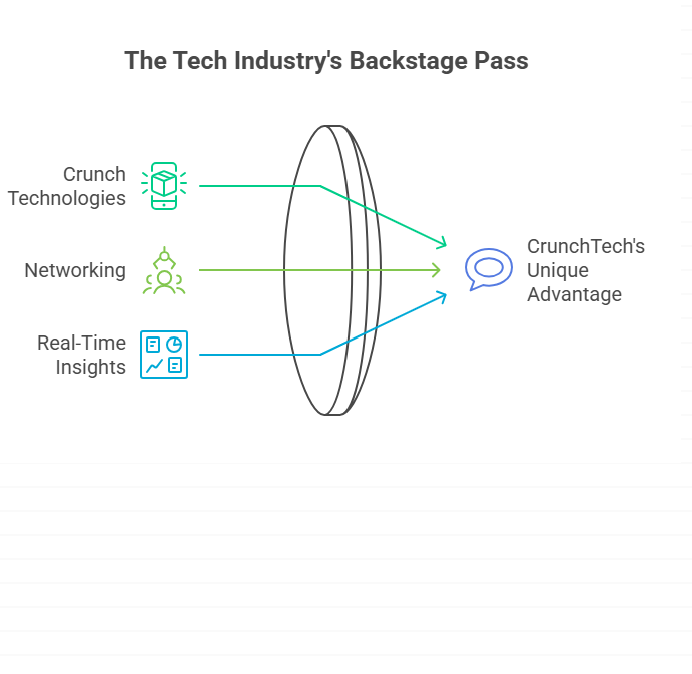
But what sets CrunchTech apart from the crowd? For many, it’s the way the platform brings together the best of crunch technologies, networking, and real-time insights. It’s like having a backstage pass to the tech industry’s most exciting developments.

“I landed my dream job through CrunchTech’s network. The connections and resources here are next-level,” shared one user in a recent online discussion.

CrunchTech vs. The Competition: What Makes It Unique?

Crunch It: The Platform’s Secret Sauce

You might have seen the phrase crunch it floating around tech forums and social media. It’s more than a catchy slogan—it’s a call to action. CrunchTech encourages users to “crunch it,” meaning to dive in, analyze, and act on the latest trends, data, and opportunities.

Unlike other platforms that simply aggregate news or data, CrunchTech’s tools let you crunch the numbers, spot patterns, and make smarter decisions—whether you’re investing, hiring, or launching a new product.

The TechCrunch Logo and CrunchTech: Are They Connected?

It’s easy to confuse CrunchTech with TechCrunch, especially with the similar-sounding names and the iconic TechCrunch logo. But while TechCrunch is a media outlet covering tech news, CrunchTech is a hands-on platform for building, scaling, and connecting in the tech world.

That said, CrunchTech has drawn inspiration from the bold, disruptive spirit that the TechCrunch logo represents. It’s about pushing boundaries and making waves.

Crunch Technologies: The Engine Behind CrunchTech

CrunchTech wouldn’t be what it is without its robust suite of crunch technologies. These are the tools and systems powering everything from AI-driven analytics to secure networking and real-time collaboration.

Key Features of Crunch Technologies

  • AI-Powered Insights: Get personalized recommendations and trend forecasts.
  • Secure Networking: Connect with verified professionals and investors.
  • Collaboration Tools: Work on projects, share files, and brainstorm in real time.
  • Market Intelligence: Access up-to-the-minute data on startups, funding rounds, and industry shifts.

These features make CrunchTech more than just a directory or a job board—it’s a living, breathing ecosystem for tech growth.

CrunchBase Careers and CrunchTech: Building the Future of Work

If you’re on the hunt for your next big opportunity, you’ve probably checked out CrunchBase careers. CrunchTech takes this a step further by integrating career tools directly into its platform.

How CrunchTech Helps You Land Your Dream Job

  • Personalized Job Matches: AI matches you with roles that fit your skills and goals.
  • Direct Connections: Message hiring managers and founders directly—no middlemen.
  • Portfolio Showcases: Share your projects, code, and achievements with the community.

It’s no wonder so many tech professionals are making the switch from traditional job boards to CrunchTech.

Real-World Example: How CrunchTech Changed a Startup’s Trajectory

Let’s look at a real-life scenario. A small AI startup was struggling to get noticed in a crowded market. After joining CrunchTech, they used the platform’s analytics to identify a niche, connected with investors through secure networking, and hired two key engineers via the career tools. Within six months, they closed a major funding round and doubled their user base.

One of the founders said, “CrunchTech didn’t just help us grow—it helped us survive. The insights and connections were game-changers.”

Crunch It: How to Get the Most Out of CrunchTech

Ready to “crunch it”? Here’s how to maximize your experience on CrunchTech:

1. Set Up a Complete Profile

First impressions matter. Fill out your profile with your skills, experience, and what you’re looking for—whether it’s funding, talent, or a new gig.

2. Use the Analytics Dashboard

Don’t just browse—dive into the data. CrunchTech’s analytics dashboard lets you track trends, monitor competitors, and spot opportunities before they go mainstream.

3. Join Groups and Events

From virtual hackathons to investor Q&As, CrunchTech’s events are where the magic happens. Join groups that match your interests and start building your network.

4. Share and Collaborate

Upload your projects, ask for feedback, and collaborate with others. The more you engage, the more value you’ll get.

CrunchTech’s Impact on the Tech Ecosystem

CrunchTech isn’t just a platform—it’s a catalyst for change. By lowering barriers to entry and making connections easier, it’s helping level the playing field for startups and professionals worldwide.

The Numbers Don’t Lie

  • User Growth: CrunchTech’s user base has tripled in the past year.
  • Funding Success: Startups on the platform have raised over $2 billion in 2024 alone.
  • Career Moves: Thousands have landed new roles or freelance gigs through CrunchTech’s career tools.

Crunch Technologies: Risks and Considerations

No platform is perfect, and CrunchTech is no exception. Here are a few things to keep in mind:

Pros

  • Comprehensive Tools: Everything you need in one place.
  • Verified Network: Less spam, more real connections.
  • Cutting-Edge Tech: Stay ahead of the curve.

Cons

  • Learning Curve: The platform’s depth can be overwhelming at first.
  • Subscription Costs: Some features require a paid plan.
  • Privacy Concerns: As with any networking site, be mindful of what you share.

CrunchTech in 2025: Features and Usability

Seamless Integration

CrunchTech works across devices, with a mobile app that’s as powerful as the desktop version. Whether you’re at your desk or on the go, you can stay connected and productive.

Customizable Dashboards

Tailor your experience with widgets and alerts that matter to you. Want to track a specific sector or company? Set it up in seconds.

AI-Driven Recommendations

CrunchTech’s AI learns from your activity and suggests connections, jobs, and content that fit your interests.

CrunchTech and the Future of Tech Networking

The days of cold emails and endless LinkedIn requests are fading. CrunchTech’s approach is more organic, more data-driven, and—frankly—more fun.

Building Real Relationships

By focusing on shared interests and real-time collaboration, CrunchTech helps you build relationships that last. It’s not just about collecting contacts—it’s about creating value.

CrunchTech vs. CrunchBase Careers: Which Is Right for You?

If you’re weighing your options, here’s a quick comparison:

FeatureCrunchBase CareersCrunchTech
Job ListingsYesYes
NetworkingLimitedExtensive
AnalyticsBasicAdvanced
Collaboration ToolsNoYes
AI RecommendationsNoYes

Verdict: If you want more than just a job board, CrunchTech is the way to go.

The TechCrunch Logo: Why Branding Still Matters

You might wonder why the TechCrunch logo is so recognizable. It’s a symbol of authority and innovation in tech media. CrunchTech, while not affiliated, has built its own brand identity—one that’s all about action, community, and results.

Branding isn’t just about logos. It’s about trust, reputation, and the promise of value. CrunchTech’s brand is quickly becoming synonymous with opportunity in the tech world.

CrunchTech Success Stories: Real People, Real Results

Here’s a tweet that sums up the CrunchTech experience:

“Just closed my first funding round thanks to CrunchTech’s investor network. If you’re not on here, you’re missing out!”

From solo developers to fast-growing startups, the stories keep coming. CrunchTech is helping people turn ideas into reality.

Crunch It: The Culture of Action

At its heart, CrunchTech is about doing, not just dreaming. The “crunch it” mentality encourages users to take risks, experiment, and learn by doing.

Why This Matters in 2025

The tech landscape is moving faster than ever. Those who act quickly—and have the right tools—are the ones who win. CrunchTech gives you the edge.

CrunchTech for Startups: A Launchpad for Growth

If you’re building something new, CrunchTech is the place to be. Here’s how it helps:

  • Find Co-Founders: Connect with like-minded builders.
  • Pitch Investors: Get your idea in front of the right people.
  • Test Ideas: Use the community for feedback and validation.

CrunchTech for Investors: Smarter, Faster Decisions

Investors love CrunchTech for its data-driven approach. With real-time analytics and verified profiles, it’s easier to spot promising startups and avoid the noise.

CrunchTech for Job Seekers: More Than a Resume

Looking for your next role? CrunchTech lets you showcase your skills, projects, and personality—not just your work history. It’s a more holistic way to get noticed.

CrunchTech for Enterprises: Innovation at Scale

Large companies are using CrunchTech to scout talent, monitor trends, and even launch internal startups. The platform’s flexibility makes it a fit for organizations of any size.

CrunchTech and Diversity: Building an Inclusive Tech Community

CrunchTech is committed to diversity and inclusion. The platform features mentorship programs, diversity-focused groups, and resources for underrepresented founders and professionals.

CrunchTech: The Pros and Cons in 2025

Pros

  • All-in-One Platform: No need to juggle multiple tools.
  • Community-Driven: Real people, real connections.
  • Constantly Evolving: New features roll out regularly.

Cons

  • Can Be Overwhelming: So many features, so little time.
  • Premium Pricing: Some advanced tools are behind a paywall.
  • Still Growing: Not as big as some legacy platforms—yet.

CrunchTech: Risks and How to Stay Safe

As with any online platform, it’s important to protect your privacy and vet connections. CrunchTech uses verification and moderation, but always use common sense when sharing sensitive info or making deals.

CrunchTech: The Verdict

CrunchTech is more than a trend—it’s a transformation. By combining the best of crunch technologies, networking, and actionable insights, it’s helping people and companies thrive in 2025’s fast-paced tech world.

Whether you’re looking to “crunch it” and launch your next project, find your dream job, or just stay ahead of the curve, CrunchTech is worth your attention.

FAQs

1. What is CrunchTech and how does it work?

CrunchTech is a tech platform that connects startups, investors, and professionals. It offers tools for networking, analytics, collaboration, and career growth—all in one place

2. How is CrunchTech different from CrunchBase careers?

While CrunchBase careers focuses on job listings, CrunchTech offers a broader suite of tools, including networking, analytics, and project collaboration.

3. Is CrunchTech affiliated with TechCrunch or the TechCrunch logo?

No, CrunchTech is not affiliated with TechCrunch. However, both share a passion for innovation and the tech community.

4. What are the main features of CrunchTech’s crunch technologies?

CrunchTech’s technologies include AI-powered insights, secure networking, real-time collaboration, and market intelligence tools.

Ready to Crunch It

If you’re serious about tech, innovation, or career growth, don’t wait. Explore CrunchTech today and see how it can help you connect, create, and succeed in 2025’s dynamic tech landscape.

CLICK HERE FOR MORE BLOG POSTS

Continue Reading
Click to comment

Leave a Reply

Your email address will not be published. Required fields are marked *

TECHNOLOGY

How to Run as Administrator in Windows 11: A Complete Guide (2026)

Published

on

How to Run as Administrator in Windows 11

How to Run as Administrator in Windows 11 Running programs with administrator privileges is a fundamental Windows 11 feature that grants applications elevated access to modify system files, install software, and perform advanced configuration tasks. When you “run as administrator,” you temporarily give a program full control over your system—access that’s normally restricted to protect your computer from unauthorized changes.

This comprehensive guide covers everything you need to know about running programs with admin rights in Windows 11, including eight proven methods, essential prerequisites, troubleshooting solutions, and critical security best practices. Whether you need to install new software, modify protected system settings, or troubleshoot persistent issues, you’ll find the exact steps you need here.

Important: To run programs as administrator, you must already have an administrator account on your Windows 11 computer. If you’re using a standard user account, you’ll need the administrator password when prompted by User Account Control (UAC).

Quick Checklist: Are You Ready to Run Programs as Admin?

Before attempting to run programs with elevated privileges, verify you have the necessary permissions and understand what to expect:

  • Check Your Account Type: Navigate to Settings > Accounts > Your info to verify you’re using an administrator account. You’ll see “Administrator” displayed under your username if you have admin rights.
  • Understand User Account Control (UAC): Expect a security prompt asking “Do you want to allow this app to make changes to your device?” This is normal behavior designed to protect your system from unauthorized modifications.
  • Gather Administrator Credentials: If you’re on a standard user account, you’ll need to enter an administrator’s username and password when the UAC prompt appears.

Why You Might Need to Run Programs as an Administrator

Several common scenarios require administrator privileges:

  • Installing or Uninstalling Software: Most applications that make system-wide changes require admin access during installation or removal.
  • Modifying System Files and Settings: Accessing protected Windows directories, editing registry entries, or changing critical system configurations requires elevated permissions.
  • Running Troubleshooting Tools: Many diagnostic utilities and system repair tools need administrator rights to analyze and fix problems.
  • Working with Legacy Programs: Older software designed for previous Windows versions may require admin privileges to function correctly on Windows 11.
  • Managing System Services: Starting, stopping, or configuring Windows services typically requires administrator access.

8 Ways to Run as Administrator in Windows 11

Windows 11 offers multiple methods to launch programs with elevated privileges. The following table provides a quick overview of each method and when to use it:

MethodBest ForKey Action / Shortcut
1. Desktop/Shortcut Context MenuQuick, one-time accessRight-click > Run as administrator
2. Start MenuPinned/frequent appsRight-click app > Run as administrator
3. Windows SearchFast app launchingType app > Ctrl+Shift+Enter
4. File ExplorerRunning executable files directlyNavigate to .exe > right-click
5. Run Dialog (Win + R)Launching with known commandsType name > Ctrl+Shift+Enter
6. Task ManagerRecovery or troubleshootingFile > Run new task > check admin box
7. Command Line (CMD/PowerShell)Advanced users & scriptingUse runas command or sudo (if enabled)
8. App Properties (Permanent)Always run a specific program as adminProperties > Shortcut/Compatibility > Check “Run as admin”

Method 1: Using the Context Menu (Desktop, Taskbar, File Explorer)

The right-click context menu is the most intuitive method for running programs as administrator. This approach works from multiple locations throughout Windows 11:

  1. Locate the program shortcut on your Desktop, in the Taskbar, or through File Explorer.
  2. Right-click the program icon or executable file (.exe).
  3. Select “Run as administrator” from the context menu.
  4. Click “Yes” when the User Account Control prompt appears.

Pro Tip: For taskbar items, you may need to right-click the icon and then right-click the program name again in the jump list to see the “Run as administrator” option.

Method 2: Via Start Menu or Windows Search

The Start Menu provides quick access to installed applications with admin privileges:

  • Click the Start button or press the Windows key.
  • Find the application in your pinned apps or All apps list.
  • Right-click the application.
  • Select “Run as administrator” from the menu.

Alternatively, use Windows Search with this powerful keyboard shortcut:

Press the Windows key and start typing the program name.

When the program appears in search results, press Ctrl+Shift+Enter instead of just Enter.

The program will launch with administrator privileges after you confirm the UAC prompt.

Keyboard Shortcut Highlight: The Ctrl+Shift+Enter combination is one of the fastest ways to elevate privileges and works in multiple contexts throughout Windows 11.

Method 3: Using the Run Dialog & Keyboard Shortcuts

Power users often prefer the Run dialog for its speed and efficiency:

  • Press Win+R to open the Run dialog box.
  • Type the executable name or full path of the program (e.g., “cmd” for Command Prompt or “regedit” for Registry Editor).
  • Instead of clicking OK or pressing Enter, press Ctrl+Shift+Enter.
  • Confirm the UAC prompt to launch the program with admin rights.

This method is particularly useful for system utilities like Command Prompt, PowerShell, Registry Editor, and other built-in Windows tools.

Method 4: Through Task Manager

Task Manager offers a reliable way to launch programs with elevated privileges, especially useful when troubleshooting or when other methods aren’t working:

  1. Press Ctrl+Shift+Esc to open Task Manager (or right-click the taskbar and select Task Manager).
  2. Click “File” in the menu bar.
  3. Select “Run new task.”
  4. Type the program name or browse to its executable file.
  5. Check the box labeled “Create this task with administrative privileges.”
  6. Click OK to launch the program.

This method bypasses the standard UAC prompt and is particularly helpful when your desktop or Start Menu is unresponsive.

Method 5: Command Prompt, PowerShell, and Windows Terminal

Advanced users and system administrators can leverage command-line tools for precise control over program execution:

Using the runas Command:

The runas command allows you to execute programs under a different user account with administrator privileges:

runas /user:Administrator “C:\path\to\program.exe”

You’ll be prompted to enter the administrator password before the program launches.

Using sudo on Windows 11:

Windows 11 now supports a sudo command similar to Linux and macOS. First, you need to enable it:

  1. Open Settings > System > For developers.
  2. Toggle on “Enable sudo.”
  3. Choose your preferred sudo configuration (new window, inline, or disabled input).

Once enabled, you can use sudo from Command Prompt, PowerShell, or Windows Terminal:

sudo program.exe

Method 6: Set a Program to Always Run as Administrator

If you need to run a specific program as administrator every single time, you can configure it permanently through the program’s properties:

Method A: Using the Shortcut Properties

  • Right-click the program shortcut and select “Properties.”
  • Click the “Shortcut” tab.
  • Click the “Advanced” button.
  • Check “Run as administrator.”
  • Click OK, then Apply.

Method B: Using the Compatibility Properties

Right-click the program executable (.exe file) and select “Properties.”

Click the “Compatibility” tab.

Under Settings, check “Run this program as an administrator.”

Click Apply, then OK.

Important Note: This permanent setting may not work for all applications, particularly Universal Windows Platform (UWP) apps downloaded from the Microsoft Store. These apps have built-in security restrictions that prevent always-elevated execution.

Troubleshooting: Fix “Run as Administrator” Not Working

Even with proper permissions, you may occasionally encounter issues when trying to run programs as administrator. Here are the most common problems and their solutions:

Why is the “Run as Administrator” Option Grayed Out?

If the “Run as administrator” option appears grayed out or is missing entirely, several factors could be responsible:

  • Universal Windows Platform (UWP) Apps: Modern apps downloaded from the Microsoft Store, including built-in Windows apps like Settings, Calculator, and Mail, don’t support traditional elevation. These apps run in a sandboxed environment with restricted permissions by design.
  • Network or Restricted Locations: Programs located on network drives or in restricted folders may have limited execution options due to security policies.
  • System Files and Services: Critical Windows system files and services are protected and cannot be run with additional elevation through normal methods.
  • Group Policy Restrictions: In managed environments (corporate or educational networks), administrators may have disabled the ability to run programs with elevated privileges through Group Policy settings.

Solution: For UWP apps that require elevated access, try running them from an administrator account directly. For traditional desktop programs, ensure you’re accessing the actual executable file rather than a shortcut that might be pointing to a system location.

How to Fix “Access Denied” or UAC Prompts Not Appearing

When you receive “Access Denied” errors or the User Account Control prompt fails to appear, try these solutions:

  • Verify Administrator Status: Confirm you’re truly using an administrator account by checking Settings > Accounts > Your info.
  • Check User Account Control Settings: Search for “UAC” in the Start Menu and select “Change User Account Control settings.” Ensure the slider is not set to “Never notify.” A completely disabled UAC can cause unexpected behavior and security vulnerabilities.
  • Enable the Built-in Administrator Account: As a temporary troubleshooting step, you can activate Windows’ hidden administrator account, which bypasses UAC prompts. Open Command Prompt as admin and run: net user administrator /active:yes (Remember to deactivate it after troubleshooting for security reasons.)
  • Try Compatibility Mode: Right-click the program, select Properties > Compatibility tab, and enable “Run this program in compatibility mode” for an earlier Windows version.
  • Take Ownership of the File: If you’re dealing with protected system files, you may need to take ownership before running them. This is an advanced technique that should be used cautiously.

Warning: Disabling UAC or using the built-in Administrator account full-time significantly reduces your system’s security. Only use these methods temporarily for troubleshooting specific issues.

Security Risks & Best Practices

While administrator privileges are necessary for many legitimate tasks, they also expose your system to significant security risks if misused. Understanding these risks helps you make informed decisions about when and how to elevate permissions.

In this photo illustration the Microsoft logo is displayed on a mobile phone screen in Ankara, Turkiye on October 11, 2025.

Critical Security Risks:

  • Malware Can Gain System Control: When you run an infected program as administrator, the malware receives the same elevated privileges, allowing it to install rootkits, modify system files, disable security software, or deploy ransomware that encrypts your entire system.
  • Accidental System Damage: With administrator access, a single mistyped command or incorrect setting can delete critical system files, corrupt the Windows registry, or render your computer unbootable.
  • Bypassing Security Layers: Running programs as admin bypasses User Account Control, one of Windows’ primary defense mechanisms against unauthorized changes.
  • Data Loss and Privacy Breaches: Elevated programs can access and transmit any data on your computer, including private files, passwords, and sensitive documents.

Essential Best Practices:

  • Only Elevate When Absolutely Necessary: Ask yourself if the task truly requires administrator privileges. Many programs run perfectly fine with standard user permissions.
  • Use a Standard User Account for Daily Tasks: Microsoft recommends using a standard account for everyday computing and only switching to an administrator account when needed. This significantly reduces the impact of security breaches.
  • Verify Program Sources: Only run programs as administrator if they come from trusted, verified publishers. Check digital signatures and download software exclusively from official websites.
  • Keep Windows Updated: Install the latest security patches and feature updates promptly. Microsoft regularly releases updates that address vulnerabilities and improve the security of elevated privilege operations.
  • Use Antivirus and Anti-Malware Software: Maintain active, updated security software that scans programs before execution, especially when running them with elevated privileges.
  • Be Cautious with Scripts and Commands: Never run PowerShell scripts, batch files, or command-line instructions from untrusted sources with administrator privileges.
  • Review UAC Prompts Carefully: Don’t automatically click “Yes” on every UAC prompt. Read what program is requesting elevation and verify it’s a legitimate request.

Remember: The principle of least privilege—using only the minimum permissions necessary for a task—is fundamental to computer security. Administrator privileges should be temporary and purposeful, not permanent and routine.

Frequently Asked Questions (FAQ)

These common questions address the most frequent concerns users have about running programs as administrator in Windows 11:

What does “run as administrator” mean in Windows 11?

Running a program as administrator means launching it with elevated privileges that grant full access to modify system files, change protected settings, and perform administrative tasks. This elevated status bypasses many of the restrictions that Windows places on standard user accounts to protect system integrity and security. When you run a program as administrator, it operates with the same permissions as the Windows operating system itself, allowing it to make changes that could affect all users and critical system components.

Is it safe to always run a program as an administrator?

No, configuring a program to always run as administrator increases security risk and is not recommended except for specific programs that absolutely require it. Running programs with persistent elevated privileges means they can always access and modify system files, even when performing routine tasks that don’t need such access. This creates a larger attack surface for malware and bypasses the important User Account Control (UAC) protection layer. Only configure permanent elevation for trusted programs from verified publishers that consistently require administrative access to function properly.

How can I run a program as admin without a password?

Generally, you cannot run programs with administrator privileges without providing credentials when User Account Control (UAC) is enabled. The password prompt is a critical security feature designed to prevent unauthorized system modifications. The only scenarios where you might avoid password prompts are: (1) you’re already logged in with an administrator account and have UAC configured to notify without dimming the desktop, (2) you’ve completely disabled UAC (strongly discouraged), or (3) you’re using the hidden built-in Administrator account. However, these configurations significantly compromise system security and are not recommended for regular use.

What’s the difference between “Run as administrator” and enabling the Administrator account?

“Run as administrator” temporarily elevates a single program’s privileges while you continue using your regular user account. Once the program closes, the elevated access ends. In contrast, enabling and using the built-in Administrator account means your entire Windows session operates with unrestricted system access. Every program you launch runs with full administrative rights by default, and you receive no UAC prompts for potentially dangerous actions. The Administrator account bypasses virtually all security restrictions, making it much riskier than selectively elevating individual programs on an as-needed basis.

Why can’t I find the “Run as administrator” option?

If the “Run as administrator” option is missing from the context menu, you may be interacting with a Universal Windows Platform (UWP) app from the Microsoft Store, which doesn’t support traditional elevation methods. Alternatively, you might be right-clicking a shortcut or link rather than the actual executable file. Try navigating to the program’s installation folder (usually in C:\Program Files or C:\Program Files (x86)) and locating the .exe file directly. Some programs also hide this option if they’re already running with elevated privileges or if Group Policy settings on a managed network have disabled this functionality.

Conclusion

Understanding how to properly run programs as administrator in Windows 11 is essential for maintaining your computer, installing software, and troubleshooting issues. While Windows 11 provides eight distinct methods to elevate program privileges—from the simple right-click context menu to advanced command-line options—the key to effective system management lies not just in knowing how to gain these privileges, but in understanding when to use them responsibly.

Always remember that administrator privileges are powerful tools that come with significant security responsibilities. Use elevation sparingly and deliberately, verify the trustworthiness of programs before granting them system-level access, maintain up-to-date security software, and never disable User Account Control for convenience. By following the methods and best practices outlined in this guide, you’ll be able to accomplish necessary administrative tasks while keeping your Windows 11 system secure and stable.

READ MORE…

Continue Reading

TECHNOLOGY

How to Use a Compass: A Step-by-Step Beginner’s Guide for Hiking & Navigation

Published

on

How to Use a Compass

How to use a compass is an essential skill for anyone who loves the outdoors. Whether you’re planning a backcountry hike, exploring unfamiliar terrain, or simply want to be prepared for emergencies, compass navigation provides reliable wayfinding that doesn’t depend on batteries or cellular signals. This comprehensive beginner’s guide will teach you everything you need to know about using a compass, from understanding its basic parts to mastering advanced techniques like adjusting for magnetic declination.

Unlike GPS devices and smartphone apps that can fail when batteries die or in areas without signal coverage, a traditional compass will always point you in the right direction. In this guide, you’ll discover the fundamental compass skills that experienced hikers rely on, learn how to combine compass use with map reading, and gain the confidence to navigate wilderness areas safely.

Why Learning Compass Skills is Essential

Modern technology has made navigation easier than ever, but it has also created a dangerous dependency. GPS devices and smartphones can fail at the worst possible moments—when batteries die, signals are lost in deep valleys or dense forests, or devices get damaged or wet. A compass, by contrast, requires no power source and will function reliably in virtually any conditions.

Beyond emergency preparedness, compass skills open up a world of adventure. The practice of orienteering—navigating from point to point using a map and compass—is both a valuable survival skill and an engaging outdoor sport. By mastering compass navigation, you’ll gain the confidence to explore remote trails, venture off established paths safely, and enjoy hiking opportunities that less-prepared adventurers might avoid. Whether you’re day hiking near home or planning multi-day wilderness expeditions, compass proficiency gives you the freedom to explore with confidence.

Understanding Your Compass: Parts Explained

Before you can use a compass effectively, you need to understand its components. While there are several types of compasses available, this guide focuses on the baseplate compass (also called a Silva-type or orienteering compass), which is the most versatile and beginner-friendly option for wilderness navigation.

The Baseplate Compass (The Most Common Type)

A baseplate compass consists of several key parts, each serving a specific navigation function:

  • Baseplate: The transparent rectangular platform that forms the body of the compass. Its transparency allows you to see the map beneath it, and it typically includes rulers marked with map scales (commonly 1:25,000 and 1:50,000) for measuring distances.
  • Magnetic Needle: The magnetized needle that freely rotates to align with Earth’s magnetic field. The red end (sometimes marked with an N) points toward magnetic north, while the white or black end points south.
  • Rotating Bezel (or Housing): The circular dial that rotates around the needle, marked with degrees from 0 to 360 (also called the azimuth ring). This allows you to set and follow specific bearings.
  • Orienting Arrow: A non-magnetic arrow inside the rotating bezel, usually outlined in red. You align the magnetic needle with this arrow when setting or following a bearing.
  • Orienting Lines: Parallel lines inside the bezel that run north-south. These lines help you align your compass with the north-south grid lines on topographic maps.
  • Direction of Travel Arrow: A large arrow printed on the baseplate that points away from the compass housing. Once you’ve set a bearing, you follow this arrow to reach your destination.
  • Index Line: A fixed mark at the base of the direction of travel arrow where you read your bearing in degrees on the rotating bezel.

Some compasses also feature additional tools like map scales (or romer), magnifying lenses, and luminescent markers for low-light navigation. These extras can be helpful but aren’t essential for basic compass use.

father and son using compass and map - how to use a compass stock pictures, royalty-free photos & images

How a Compass Actually Works

Understanding the science behind your compass helps you use it more effectively. A compass works because of Earth’s magnetic field, which is generated by the movement of molten iron in the planet’s outer core. This magnetic field extends from the poles and creates invisible lines of force that circle the globe.

The magnetic needle in your compass is a small bar magnet that’s balanced on a pivot point, allowing it to rotate freely. Like all magnets, it has a north-seeking pole and a south-seeking pole. When held level, the needle aligns itself with Earth’s magnetic field lines, causing the north-seeking end (typically colored red) to point toward magnetic north.

It’s important to note that the magnetic needle doesn’t point to true north (the geographic North Pole), but to magnetic north, which is located in northern Canada and slowly shifts over time. This difference—called magnetic declination—is something we’ll address in detail later in this guide, as it’s crucial for accurate navigation.

The Foundational Skill: Finding North and Your Heading

Before you can navigate to any destination, you must first master the fundamental skill of finding north. This basic technique forms the foundation for all other compass navigation methods.

To find north, hold your compass flat in your palm at chest height, ensuring it’s level—this is critical because a tilted compass can give inaccurate readings. Step away from any metal objects (belt buckles, watches, cell phones, keys) that might interfere with the magnetic needle. Allow the needle to settle and stop spinning, which usually takes just a few seconds.

Now rotate the bezel until the orienting arrow (the outlined arrow in the housing) lines up perfectly with the red end of the magnetic needle. The direction indicated by the direction of travel arrow on your baseplate now points north. The degree marking at the index line shows your current heading.

This simple skill allows you to orient yourself in any environment. If you become disoriented on a trail, finding north helps you determine which direction you’ve been traveling and which way you need to go. Combined with basic knowledge of your surroundings (such as knowing a road lies to the east or a river flows north), finding north can help you navigate back to safety even without a map.

How to Use a Compass With a Map (The Power Combo)

While a compass alone is useful, combining it with a topographic map unlocks its full navigational potential. This powerful partnership allows you to pinpoint your exact location, plot courses to distant destinations, and navigate with precision through complex terrain. The process involves three key steps.

Step 1: Orient Your Map to the Terrain

Orienting your map means aligning it so that features on the map match the actual terrain around you—north on the map points to north in the real world. This makes it much easier to identify landmarks and understand your surroundings.

Start by laying your map flat on a stable surface. Place your compass on the map with the edge of the baseplate parallel to the map’s north-south grid lines (these are the vertical lines running through the map, also called easting lines). Ignore the needle for now.

Rotate both the map and compass together as a unit, keeping them flat, until the red end of the magnetic needle aligns with the orienting arrow in the compass housing. Your map is now oriented—north on the map points north in reality. The features you see around you should now match their positions on the map. If there’s a mountain to your east, it should appear to the right side of the map from your current position.

Step 2: Take a Bearing from the Map

Taking a bearing means determining the compass direction from your current location to your destination. This converts a visual reference on your map into a precise direction you can follow.

Place your compass on the map so that one edge of the baseplate creates a straight line connecting your current position to your destination. The direction of travel arrow should point toward your destination, not back toward your current location.

While keeping the baseplate in this position, rotate the bezel (not the entire compass) until the orienting lines inside the housing are parallel to the north-south grid lines on your map. Make sure the orienting arrow points toward the top (north) of the map. Now look at the index line—the number displayed shows your bearing in degrees. This is the direction you need to travel.

Step 3: Follow Your Bearing in the Field

Now that you’ve determined your bearing, you’re ready to navigate. Hold your compass flat at chest level with the direction of travel arrow pointing straight ahead. Rotate your entire body (not just the compass) until the red end of the magnetic needle aligns with the orienting arrow—this is sometimes called “putting red in the shed” or “red to red.”

The direction of travel arrow now points toward your destination. Pick a landmark in that direction—a distinctive tree, rock formation, or hilltop—and walk toward it. When you reach that landmark, repeat the process: hold the compass level, align the needle with the orienting arrow, pick a new landmark in the direction of the travel arrow, and continue.

This technique allows you to navigate around obstacles (lakes, cliffs, dense brush) while maintaining your overall direction. Instead of constantly watching your compass while walking—which is dangerous and inefficient—you’re using it strategically to stay on course toward your destination.

Critical Advanced Knowledge: Magnetic Declination

Here’s where many beginners (and even some experienced hikers) go wrong: they don’t account for magnetic declination. This is the difference between true north (the direction to the geographic North Pole, which maps use) and magnetic north (where your compass needle points). Failing to adjust for declination can throw your navigation off by several degrees, potentially leading you miles from your intended destination.

Magnetic declination varies depending on your location on Earth. In some areas of the United States, magnetic north is east of true north (called easterly or positive declination), while in others it’s west of true north (westerly or negative declination). The declination can range from 0 degrees (where magnetic and true north align) to more than 20 degrees in some locations.

You can find the magnetic declination for your area by checking the margin of topographic maps, which typically includes a declination diagram. You can also look it up online using resources from the National Oceanic and Atmospheric Administration (NOAA) or the United States Geological Survey (USGS).

To adjust for declination, you have two options. The first method is to adjust your compass bearing. If declination is easterly, subtract it from the bearing you measured on your map. If it’s westerly, add it to your bearing. For example, if your map bearing is 90 degrees and local declination is 15 degrees east, your compass bearing should be 75 degrees.

The second method is using a compass with adjustable declination. Many modern compasses include a small adjustment mechanism that allows you to offset the orienting arrow by the local declination amount. Once set, the compass automatically accounts for declination, eliminating the need for mental math during navigation. This is a valuable feature if you frequently navigate in the same region.

Understanding and adjusting for magnetic declination is what separates casual compass users from competent navigators. It’s a concept that neither casual GPS users nor many beginner compass guides adequately address, but it’s absolutely essential for accurate wilderness navigation.

Practical Compass Drills & Safety Tips

Reading about compass use and actually mastering the skill are two different things. Like any outdoor skill, compass navigation requires hands-on practice in controlled environments before you rely on it in the backcountry. Here are practical exercises and safety guidelines to build your confidence and competence.

Practice Exercises for Beginners

Start in a local park or open area where you can see landmarks easily. One excellent beginner drill is the “square walk”: set a bearing, walk 50 paces, then turn 90 degrees and walk 50 more paces. Repeat four times, and you should end up very close to where you started. This exercise teaches you to hold accurate bearings and understand how small errors compound over distance.

Another valuable skill is triangulation, which allows you to determine your position using two or more known landmarks. Practice by identifying two distant landmarks that appear on your map. Take a bearing to each landmark, plot these lines on your map (remember to adjust for declination), and your position is where the lines intersect.

For teaching kids or making practice more engaging, organize a treasure hunt. Hide objects around a park and create a series of bearings and distances that lead from one to the next. This gamifies the learning process and builds real-world navigation skills in a low-stakes environment.

Consider taking an orienteering course or joining a local orienteering club. Orienteering combines map and compass navigation with elements of racing and problem-solving. It’s an excellent way to develop your skills while meeting other navigation enthusiasts.

Common Mistakes and How to Avoid Them

Even experienced navigators can fall into bad habits. Being aware of common mistakes helps you avoid them:

  • Holding the compass near metal or electronics: Belt buckles, watches, cell phones, car hoods, and even reinforced backpack frames can deflect the magnetic needle. Always step a few feet away from potential interference when taking a reading.
  • Not holding the compass level: A tilted compass gives inaccurate readings because the needle can’t move freely. Always hold it flat.
  • Confusing the north end of the needle: In a moment of confusion or poor lighting, it’s surprisingly easy to align the wrong end of the needle with the orienting arrow, sending you 180 degrees off course. Always double-check that red is pointing north.
  • Forgetting to adjust for declination: This is perhaps the most common serious error. Always know your local declination and factor it into your navigation.
  • Not regularly checking your bearing: It’s easy to drift off course, especially when navigating around obstacles. Take frequent compass readings to ensure you’re still heading in the right direction.
  • Over-relying on the compass without checking the map: Your compass tells you direction, but your map tells you what terrain lies ahead. Use them together.

Compass Safety & Maintenance

Proper compass care ensures reliability when you need it most. Store your compass away from magnets and magnetic fields, which can gradually demagnetize the needle or even reverse its polarity. Before any major trip, check your compass accuracy against a known bearing or compare it to another compass.

Never rely solely on a compass. Always carry a paper topographic map as a backup, and ideally a second compass or GPS device. Let someone know your planned route and expected return time before heading into the wilderness. This is basic wilderness safety that applies whether you’re navigating by compass, GPS, or trail markers.

If you do become lost, stay calm. Use your compass to determine which direction you came from (a back bearing—simply add or subtract 180 degrees from your original bearing). If you’re unsure of your location, stay put if conditions are safe, make yourself visible, and wait for help. Random wandering usually makes things worse.

Modern compasses are quite durable, but they’re not indestructible. Protect your compass from hard impacts, which can damage the pivot point or crack the housing. If liquid-filled, check periodically for air bubbles, which can indicate a crack or seal failure. Small bubbles that disappear at room temperature are normal, but large persistent bubbles suggest damage.

Choosing and Caring for Your Compass

Not all compasses are created equal. For wilderness navigation, a baseplate compass (also called an orienteering compass) is the gold standard for beginners and experienced navigators alike. Brands like Silva, Suunto, and Brunton make reliable models that balance features with affordability.

A good beginner compass should have a transparent baseplate with a straight edge, a rotating bezel marked in degrees, clear orienting lines and arrow, and a direction of travel arrow. Useful additional features include a built-in declination adjustment, a sighting mirror (for taking more precise bearings on distant objects), and a lanyard for attaching it to your pack.

Lensatic compasses, which are popular with military users, offer excellent durability and precision but have a steeper learning curve and aren’t as convenient for map work. Button compasses are too simple for serious navigation. Avoid cheap promotional compasses or phone apps as your primary navigation tool—they lack the reliability and precision needed in the wilderness.

When shopping, expect to pay $15-$50 for a quality baseplate compass. Models in the $25-$40 range offer the best balance of features and reliability for most hikers. More expensive models include features like global needle balancing (for international travel) and enhanced sighting systems, which most recreational users won’t need.

Care for your compass by storing it in a protective case when not in use, keeping it away from magnets and electronic devices, and periodically checking that the needle moves freely. With proper care, a quality compass will provide decades of reliable service.

Frequently Asked Questions About Using a Compass

Q: How does a compass work?

A: A compass uses a magnetized needle that aligns with Earth’s magnetic field. The needle is balanced on a pivot point and free to rotate, causing its north-seeking end to point toward magnetic north. This happens because Earth itself acts like a giant magnet, with magnetic field lines running between the magnetic poles.

Q: Can you use a compass without a map?

A: Yes, you can use a compass without a map to maintain a consistent direction (follow a bearing) or to find north and re-orient yourself. However, a map is necessary for precise navigation to specific locations. Without a map, you won’t know what terrain lies ahead or be able to identify your exact position.

Q: What is the difference between true north and magnetic north?

A: True north is the direction to the geographic North Pole, located at the top of Earth’s axis of rotation. This is what maps use. Magnetic north is the direction toward the northern magnetic pole, where Earth’s magnetic field points downward. Magnetic north is currently located in northern Canada and slowly shifts over time. The angular difference between these two norths is called magnetic declination, which varies by location and must be accounted for when using a compass with a map.

Q: How do you use a compass for orienteering or hiking?

A: Compass navigation for hiking and orienteering involves three main skills: orienting your map to match the terrain, taking a bearing from the map to your destination, and following that bearing in the field. You combine these techniques with regular map checks, terrain association, and adjustments for magnetic declination to navigate accurately from point to point.

Q: Why is my compass needle not moving or spinning freely?

Q: What’s the best compass for a beginner?

A: A stuck compass needle may indicate several problems: the compass might be demagnetized, the needle could be physically damaged or dislodged from its pivot, or there might be a manufacturing defect. First, ensure you’re not near strong magnetic interference (electronics, metal objects, car). If the problem persists, the compass may need professional recalibration or replacement. This is rare with quality compasses but can occur after hard impacts or exposure to very strong magnetic fields.

A: A transparent baseplate compass from a reputable manufacturer is ideal for beginners. Look for models like the Silva Starter, Suunto A-10, or Brunton TruArc 3. These compasses cost between $15-$30, include all essential features, and are designed specifically for map-and-compass navigation. Avoid cheap toy-like compasses or button compasses, as they lack the precision and features needed for serious hiking and orienteering.

Conclusion: Building Your Navigation Confidence

Learning to use a compass is an investment in your outdoor confidence and safety. While GPS technology has its place, the traditional compass remains an essential backcountry tool that requires no batteries, satellites, or cellular coverage. By understanding your compass’s parts, mastering the core skills of finding bearings and orienting maps, and accounting for magnetic declination, you’ll have the foundation for safe wilderness navigation.

Remember that reading this guide is just the beginning. Real proficiency comes from practice—in parks, on familiar trails, and gradually in more challenging terrain. Start with simple exercises, combine your compass with map study, and build your skills progressively. Consider taking a formal navigation course or joining an orienteering club to accelerate your learning and connect with experienced navigators.

READ MORE…

Continue Reading

TECHNOLOGY

Verizon BenefiVerizon Benefits Connection Login: Your Complete Guide to Accessing Your BenefitsVerizon Benefi

Published

on

Verizon Benefits Connection employee login portal interface

The Verizon Benefits Connection portal is your gateway to managing health insurance, retirement savings, life insurance, and wellness programs online. This guide walks you through the login process, troubleshooting common issues, and understanding what tools are available once you access your account.

How to Log In to Verizon Benefits Connection

Accessing your benefits account requires just a few simple steps:

  1. Navigate to the official login portal at baportal.verizonbenefitsconnection.com
  2. Enter your User Name in the first field (typically your employee ID or corporate email)
  3. Enter your PIN in the second field
  4. Click the login button to access your benefits dashboard

The verizon benefits connection login portal uses a secure authentication system to protect your personal information and ensure only authorized users can view benefits details.

What to Do If You Forgot Your Login Credentials

Login problems are common, especially if you haven’t accessed the portal recently. Here’s how to resolve the most frequent credential issues:

Forgot Your PIN

If you can’t remember your PIN, use the “Change My PIN” link located directly on the login page at baportal.verizonbenefitsconnection.com. This self-service option allows you to reset your PIN immediately without contacting support.

Forgot Your User Name

Your User Name is typically your employee identification number or the email address associated with your employment records. If you’re unsure, check your most recent pay stub or contact your HR department for assistance.

Account Locked

After multiple failed login attempts, your account may be temporarily locked for security reasons. Wait 30 minutes before trying again, or contact Verizon Benefits support for immediate assistance.

Important Login Requirements & Troubleshooting

The Benefits Connection system has specific technical requirements that can affect your ability to log in successfully.

Browser Compatibility

The portal requires Internet Explorer 7 or higher for optimal functionality. While modern browsers like Chrome, Firefox, and Edge often work, you may encounter display issues or errors with certain features. If you experience problems, try switching browsers or updating to the latest version.

Common Login Errors and Solutions

“Invalid Credentials” Error: Double-check that caps lock is off, as both User Name and PIN are case-sensitive. Ensure you’re not accidentally adding spaces before or after your credentials.

Page Won’t Load: Clear your browser’s cache and cookies, then restart your browser. A cached version of the login page can sometimes cause authentication failures.

Connection Timeout: Check your internet connection stability. The portal requires authorized access through secure networks and may not function properly on public WiFi without additional security measures.

Blank Screen After Login: Disable browser extensions or pop-up blockers temporarily, as these can interfere with the portal’s functionality.

What You Can Do Inside the Benefits Portal

Once you successfully complete your verizon benefits connection login, you’ll have access to comprehensive tools for managing your employee benefits package.

Health and Wellness Benefits

The portal allows you to view and manage your medical, dental, and vision insurance plans. You can review coverage details, find in-network providers, access digital ID cards, and submit claims. Wellness program information, including fitness reimbursements and health screenings, is also available in this section.

Retirement and Financial Planning

Access your 401k account details, including current balance, contribution rates, and investment allocations. You can adjust your retirement savings percentage, change investment options, and download quarterly statements. The portal also provides retirement planning calculators to help you estimate future income needs.

Life Insurance and Beneficiaries

Review your current life insurance coverage amounts and update beneficiary information as your life circumstances change. You can also purchase additional voluntary life insurance coverage directly through the portal during open enrollment periods.

Forms and Tax Documents

Download important forms including benefits enrollment documents, W-2 forms, 1095-C health coverage statements, and summary plan descriptions. These documents are typically available for the current year and up to three previous years.

Open Enrollment

During annual open enrollment, the portal becomes your primary tool for reviewing and selecting benefits for the upcoming year. You can compare plan options, estimate costs, and submit your elections before the deadline.

Frequently Asked Questions

Is Verizon Benefits Connection the same as Verizon Wireless?

No, the Benefits Connection portal is specifically for Verizon employees to manage their workplace benefits. It is separate from Verizon Wireless customer accounts. If you’re looking to pay your phone bill or manage your wireless service, visit the Verizon Wireless website instead.

Who is eligible to use the Verizon Benefits Connection portal?

Current Verizon employees who are enrolled in company benefits programs can access the portal. Retirees may have access to limited features depending on their retirement benefits package. Family members cannot create separate accounts but are included in the primary employee’s coverage information.

I’m locked out of my account. What should I do?

Account lockouts typically occur after multiple failed login attempts. Wait 30 minutes for the automatic unlock, then try logging in again. If you continue experiencing issues, contact the Verizon Benefits Service Center during business hours for immediate assistance.

What if I have questions about my benefits themselves, not the website?

For questions about coverage details, claims, or benefits eligibility, contact the specific benefits provider directly. Phone numbers and contact information for your medical insurance carrier, 401k administrator, and other providers are available within the portal once you log in.

Can I access the portal on my mobile phone?

Yes, the verizon benefits connection login portal is accessible from mobile devices through your phone’s web browser. However, some features may display differently on smaller screens, and certain documents may be easier to view on a desktop computer. There is currently no dedicated mobile app for Benefits Connection.

Getting Additional Help

If you continue experiencing login difficulties after following these troubleshooting steps, contact the Verizon Benefits Service Center. Support representatives can verify your account status, unlock your account, and provide technical assistance with browser issues or system requirements.

Remember to have your employee ID number ready when calling for the fastest service. The support team can also answer questions about specific benefits offerings, enrollment deadlines, and documentation requirements.

For security reasons, never share your login credentials with anyone, and always log out completely when accessing the portal from a shared or public computer.

CLICK HERE FOR MORE BLOG POSTS

Continue Reading

Trending